Team Placement
Team Placement offers a set of controls for organizing player spawns. This organization begins with the ‘Starting Location’ points, which you can place using the Terrain Module. These points indicate all of the possible locations where a player may spawn, but they are only markers. There is no logic determining which players may spawn onto them under given circumstances. Instead, this logic is set at Team Placement, where locations are grouped into specific arrangements determining how and where teams spawn.
Despite this system having been originally established for melee maps, it is still useful when working on non-traditional games. The system of grouping players via start locations and controlling team spawns relative to enemies can be used for any map type, though it can be of limited use beyond melee play.
Team Placement (Basic) and Team Placement (Advanced) are subsections of Player Properties and can be found grouped together under the same window as the Player Properties tab. Otherwise, you can find Team Placement by navigating to Map ▶︎ Team Placement (Basic) or Map ▶︎ Team Placement (Advanced).
 Team Placement Views
Alongside this article, you’ll find an illustrative demo map. This map contains twelve starting locations spread roughly equidistant around the edges of a square, allowing for many reasonable team-spawning arrangements.
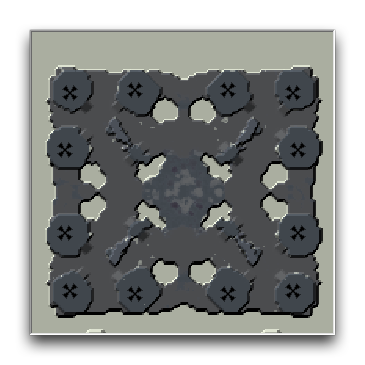 Demo Map Minimap
Basic Team Placement
Open Basic Team Placement with Map ▶︎ Team Placement (Basic). As well as the current project’s minimap, you will see a listing of every starting location on the map. You can determine teams by selecting each Start Location and linking them to potential allies. For Basic Team Placement, you must then use either Game Variants or triggers to activate these teams in a game.
Demoing Basic Team Creation
You can create team links by selecting a start location via the Start Locations subview, then selecting the checkbox of another start location in the Linked Allies subview. Using the demo map, select Start Location 001 in the northwest corner of the map, then click the checkboxes of its two closest neighbouring start locations, Start Location 002 and Start Location 012. As you add allies to a team, their starting locations will turn green. Finishing this step should give the following result.
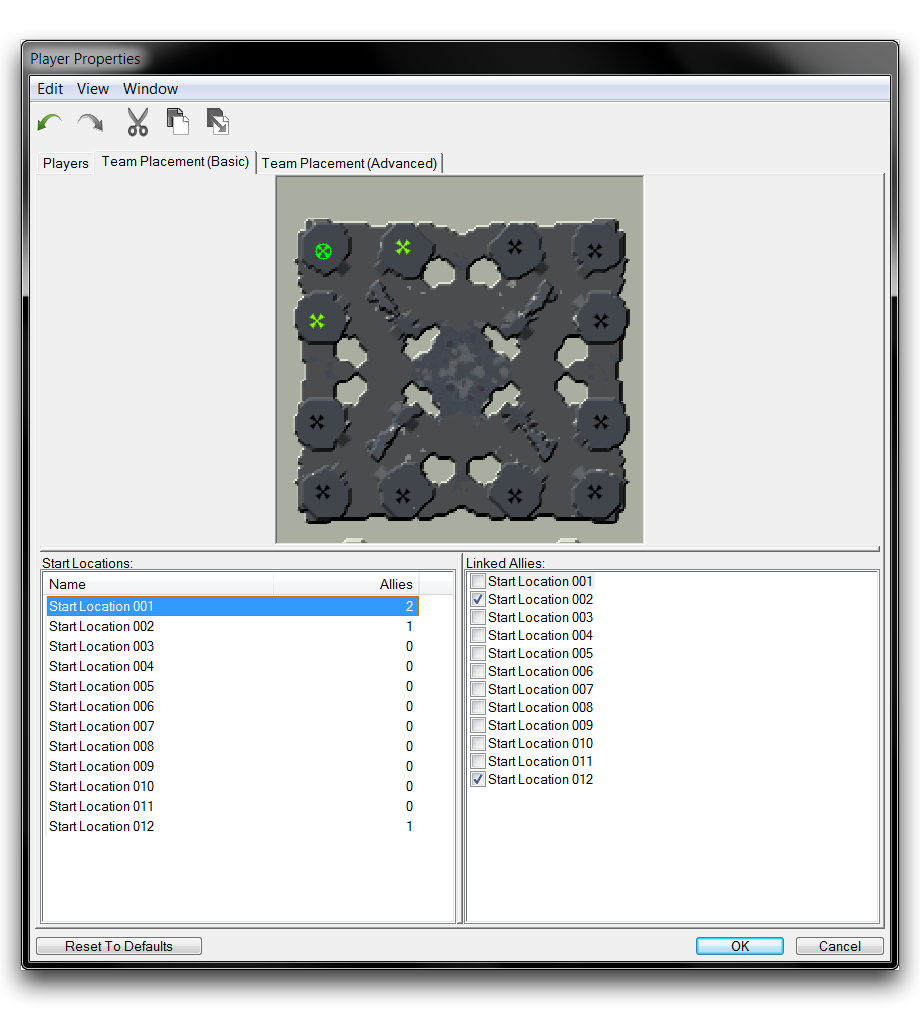 Basic Team Setup
The Allies field next to each starting location will show the number of allies linked to each Starting Location. Generally, you’ll want each start location to have the same number of allies for melee maps, as this would demonstrate a symmetrical amount of arrangement options. Continue to link Starting Locations, connecting each of the three remaining corner start locations to their respective neighbours. The finished map should look like the image below. Note that each potential team arrangement has the same number of allies.
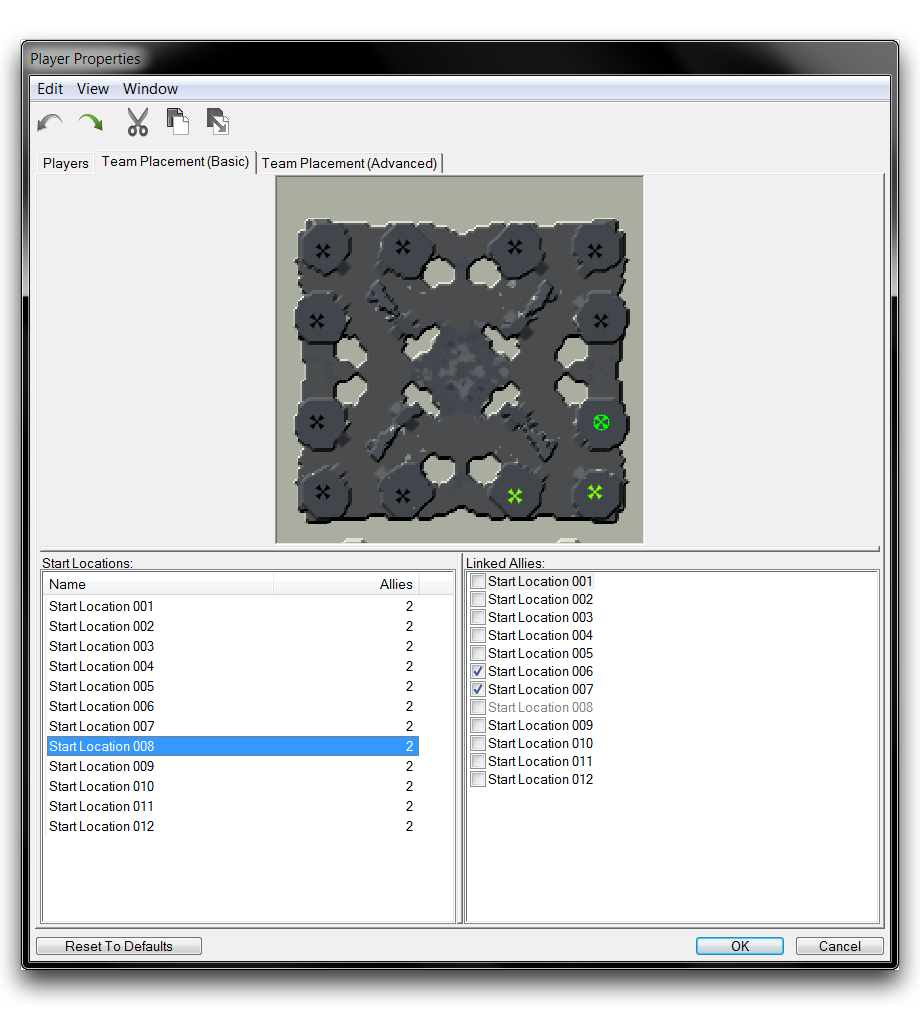 Fully Configured Team Placement
Advanced Team Placement
Open Advanced Team Placement by navigating to Map ▶︎ Team Placement (Advanced). Beside the minimap view, you will find a listing for Teams and Linked Enemy Teams. The Teams category lets you arrange teams as you did in Basic Team Placement, which are then paired with enemy team configurations. Unlike Basic Team Placement, this is a conclusive option, handling both team construction and the selection of possible enemy team arrangements. Once done, the game can be briefly set in ‘Game Variants’ then be fully prepped for gameplay.
Demoing Advanced Team Creation
You can add a team by clicking on the ‘New’ button beneath the ‘Teams’ subview. You will be taken to the window shown below.
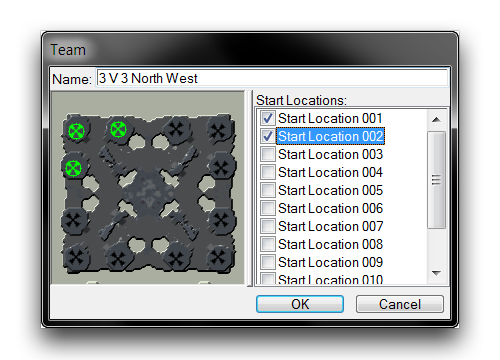 Team Creation Pop Up
Here teams can be built by selecting groups of start locations. In this case, choose ‘Start Location 001,’ ‘Start Location 002,’ and ‘Start Location 012’ to create a team in the North West corner of the map. Name it ‘3 V 3 North West’. Repeat this process for each corner of the map using similar naming conventions. You should now have a total of four teams. Note that each team becomes available as a ‘Linked Enemy Team’ as it is added.
Now, you’ll link two teams as enemies. Select a team, use ‘3 V 3 North West’ for this example, then select the teams you wish to be possible enemy arrangements from the ‘Linked Enemy Team’ subview. This result should look like the image below.
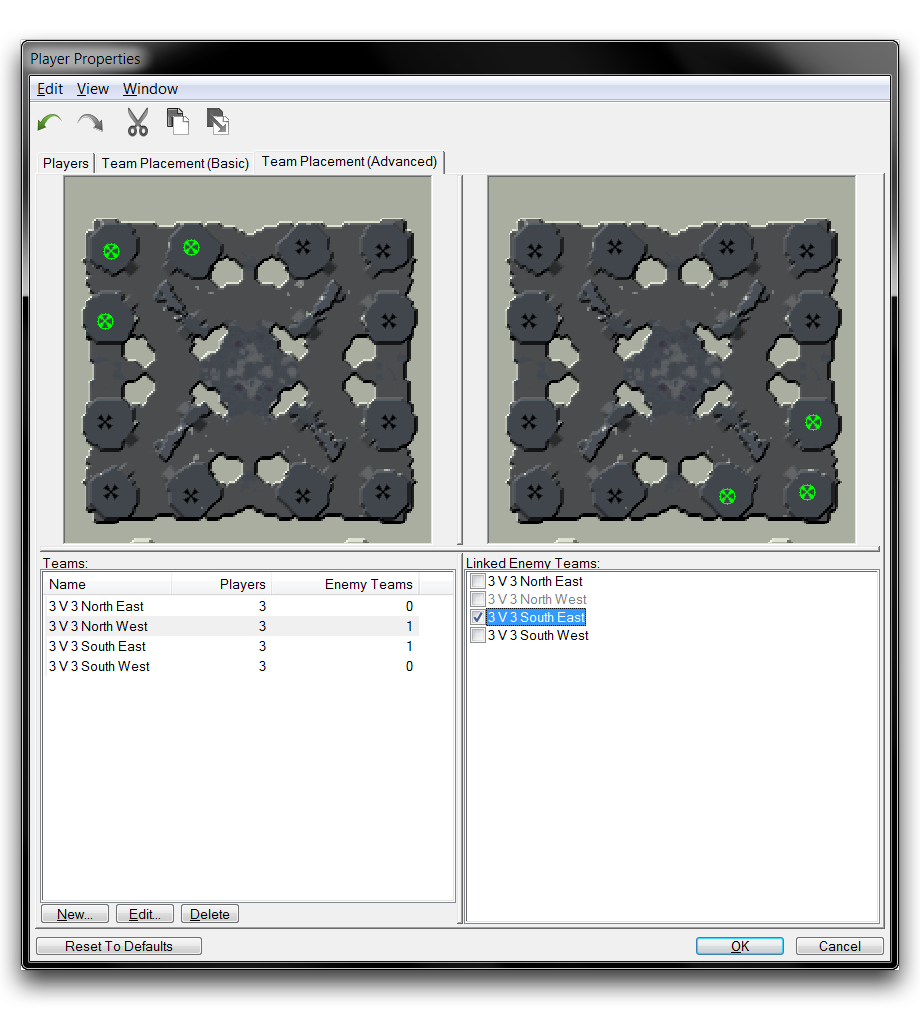 Team Arrangements Matched as Foes
This system supports teams of any size, but the teams should be paired with equally-sized groups of opponents. It is also worth noting that teams cannot share any start locations between them. Still, there are many possible configurations supported here. Below you will find an alternative arrangement.
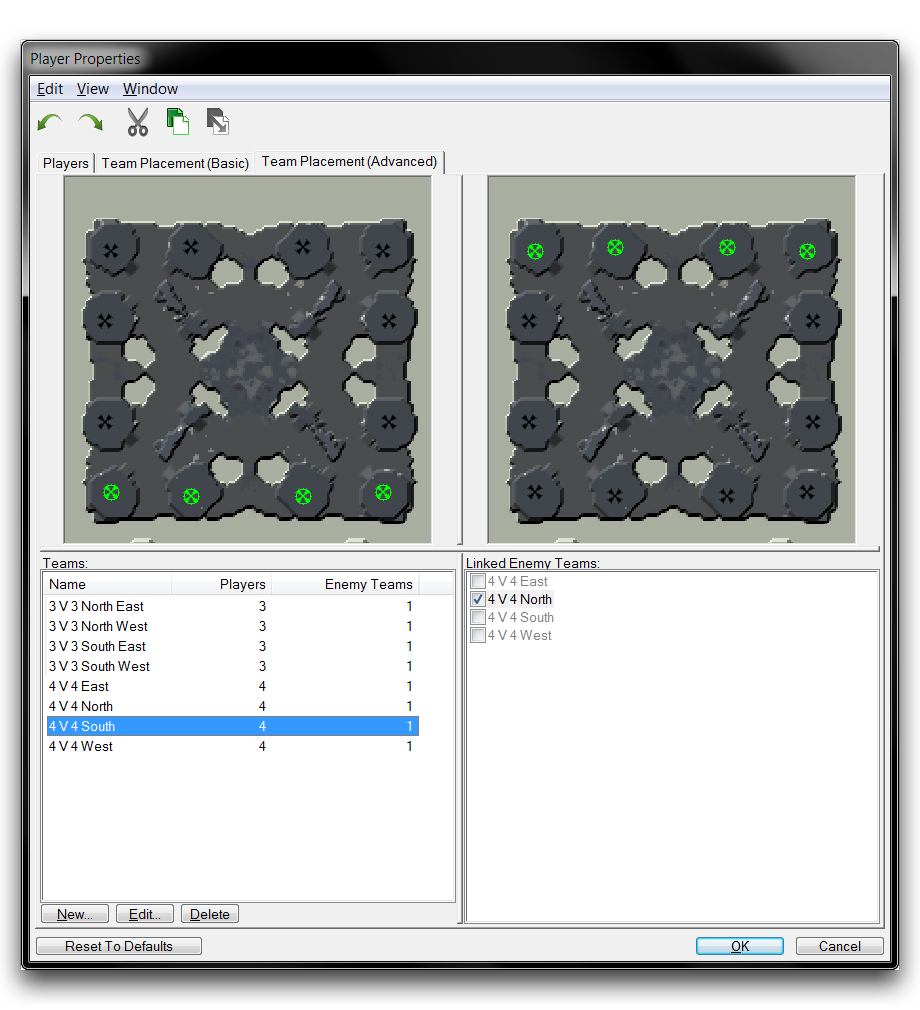 Further Team Arrangement Possibilities
In closing, you should be aware that Advanced Team Placement is a more powerful option than Basic Team Placement. As a result, it will take precedence if both areas are configured within a map.