Lighting
The Editor features a robust lighting system that you can use to create a wide palette of moods, looks, and feels for your project. The image below is an example of how the same scene can be realized in different ways by editing the lighting alone.
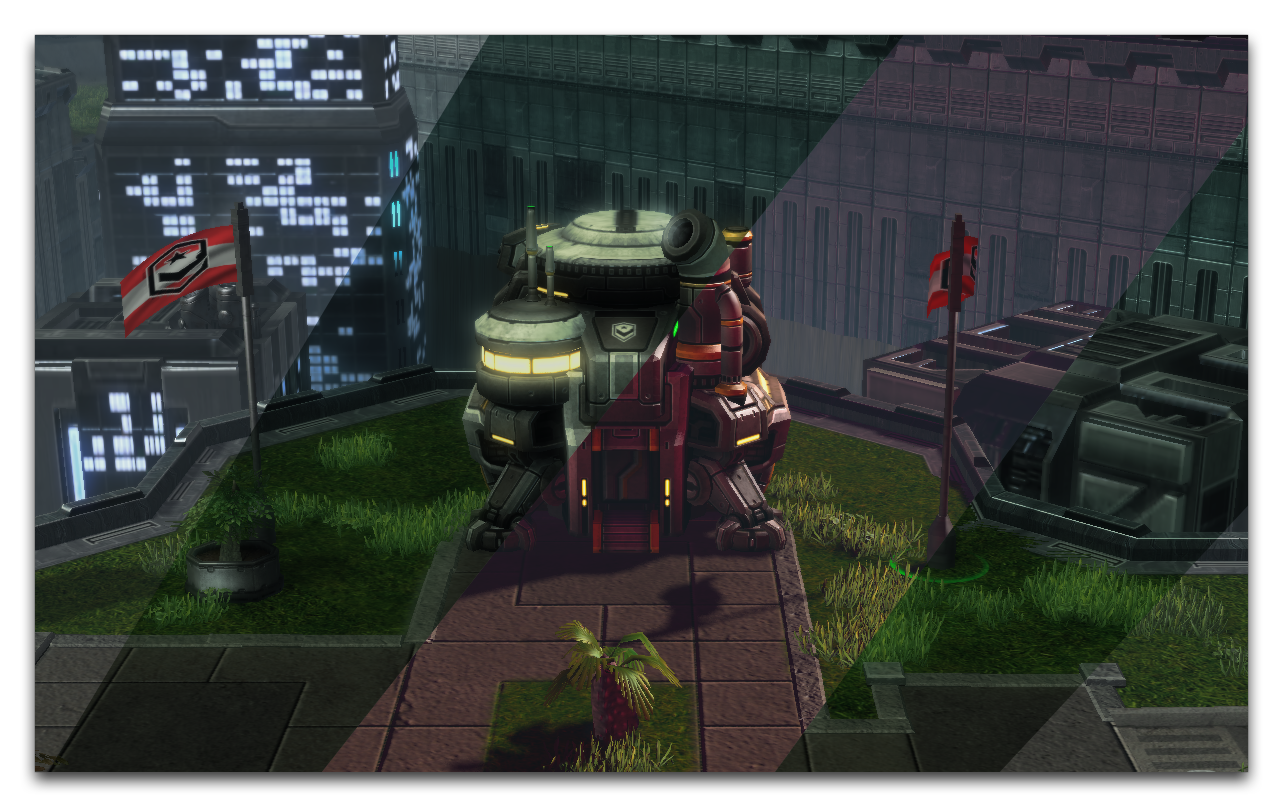 Varied Lighting on the Same Scene
Lighting Details
Lighting is actually accomplished in a number of different ways in the StarCraft engine. You may recall seeing light sources like street lamps props and mining lights attached to characters. Some spell and ability effects can even dynamically light a scene in interesting ways, but this article will focus on global lighting effects within a map.
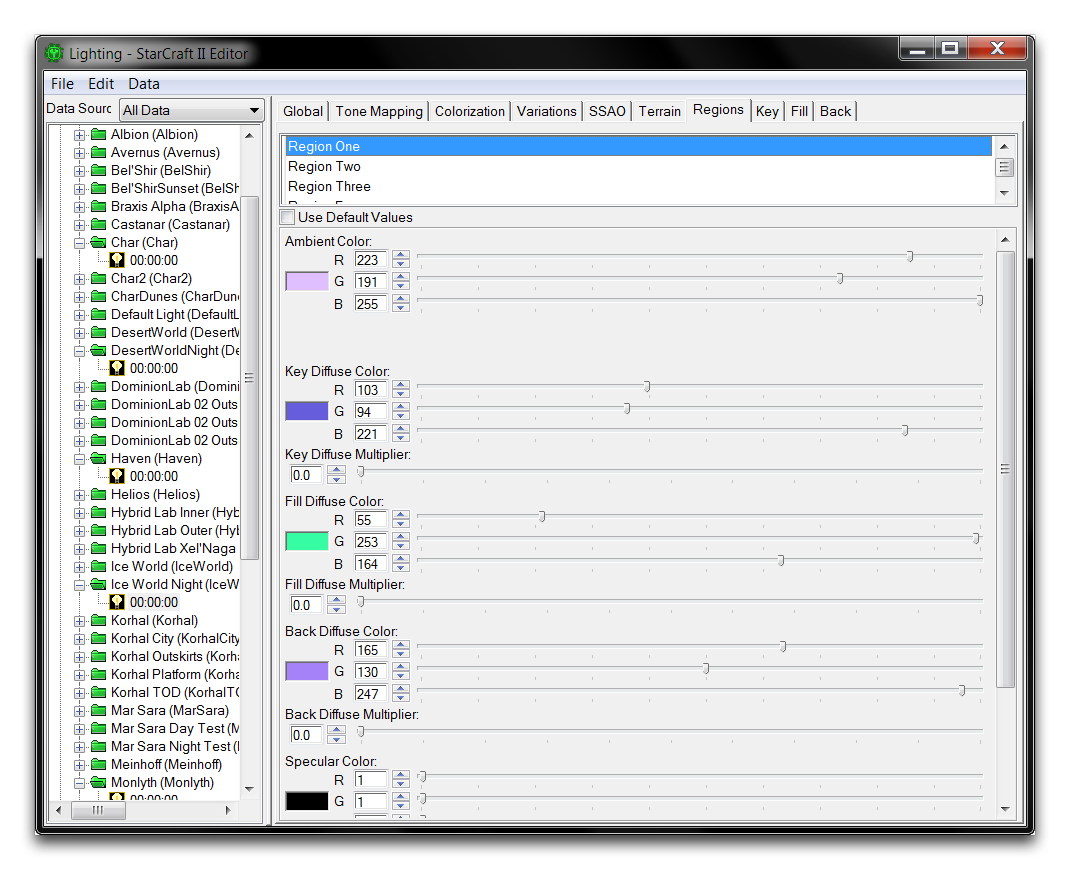
The lighting in a map is set to one particular style at a time. It can then be dynamically altered to other styles during gameplay. You’ll find these lighting styles in an extensive data type called Lights, which is handled directly through the Data Editor. Due to the number of options available when working with lighting, the Editor also features a special tool called the Lighting Window. This interface collects all of the lighting controls and puts them alongside the pre-built lighting styles within the Editor.
 Varied Lighting on the Same Scene
Demoing Lighting
Open the demo map provided with this article. You’ll see that it contains a scene in which a bar front is lit with a default lighting setting that looks like natural sunlight. First, you’ll learn how to change the lighting from day to night, then how to use triggers to slowly reintroduce daytime lighting, simulating a sunrise.
The best place to start is in the Data Editor. Lighting is applied on the basis of the current Terrain Type. This is the designation in data for the landscape controlling the textures, style of doodads, and so forth. The demo map is set to the ‘Agria (Jungle)’ type. Open the ‘Terrain Type Tab’ by clicking on the ‘New Tab’ + button and navigating to Edit Terrain Data ▶︎ Terrain Types. Now, set the lighting by double clicking on the ‘Lighting’ property as shown below.
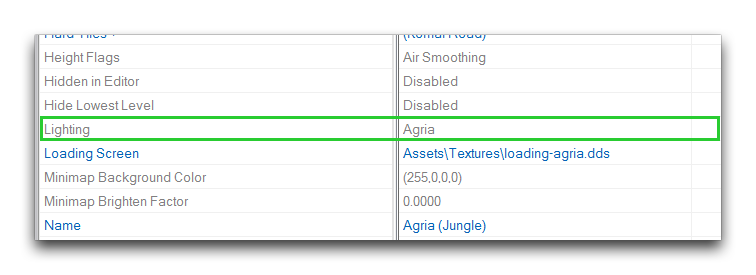 Lighting Data Property
If you’re unsure what Terrain Type your map is using, you can see it by navigating to Map ▶︎ Map Textures. The field ‘Current Texture Set’ will provide the answer, as shown below.
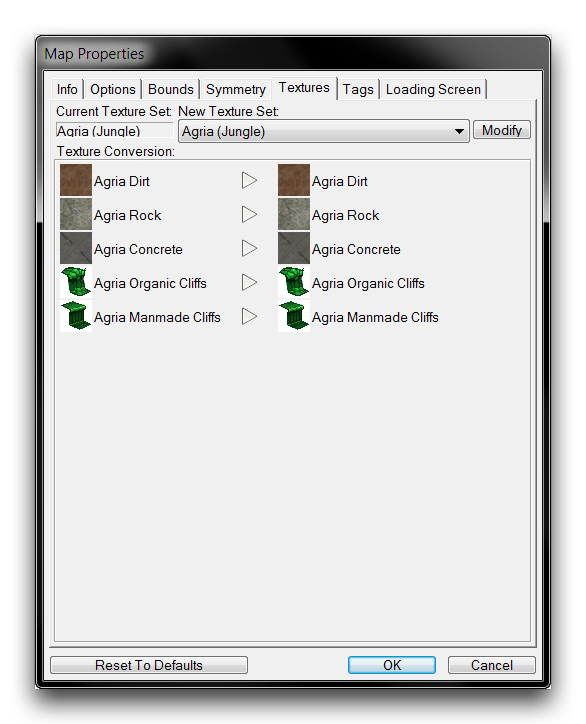 Checking Terrain Type
Clicking on the ‘Lighting’ field will launch the ‘Object Values’ window. Find the ‘Mar Sara Night Test’ lighting, select it, and click ‘Ok.’
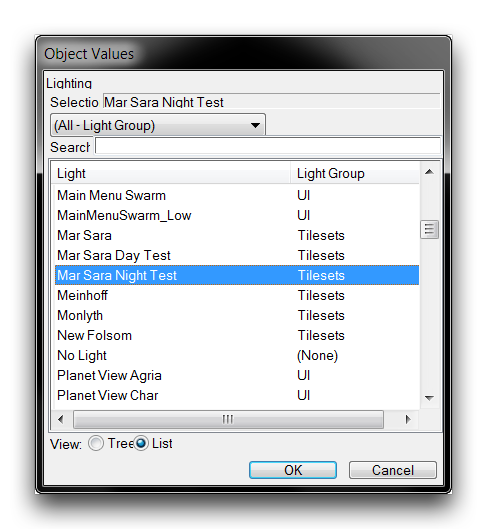 Selecting Lighting
Confirm that you’ve successfully changed the terrain’s lighting by opening the Terrain Module and selecting Render ▶︎ Show Lighting ▶︎ Game Lighting. The main view should show a much darker, twilit scene. The difference between the original lighting settings and the new ones is shown below.
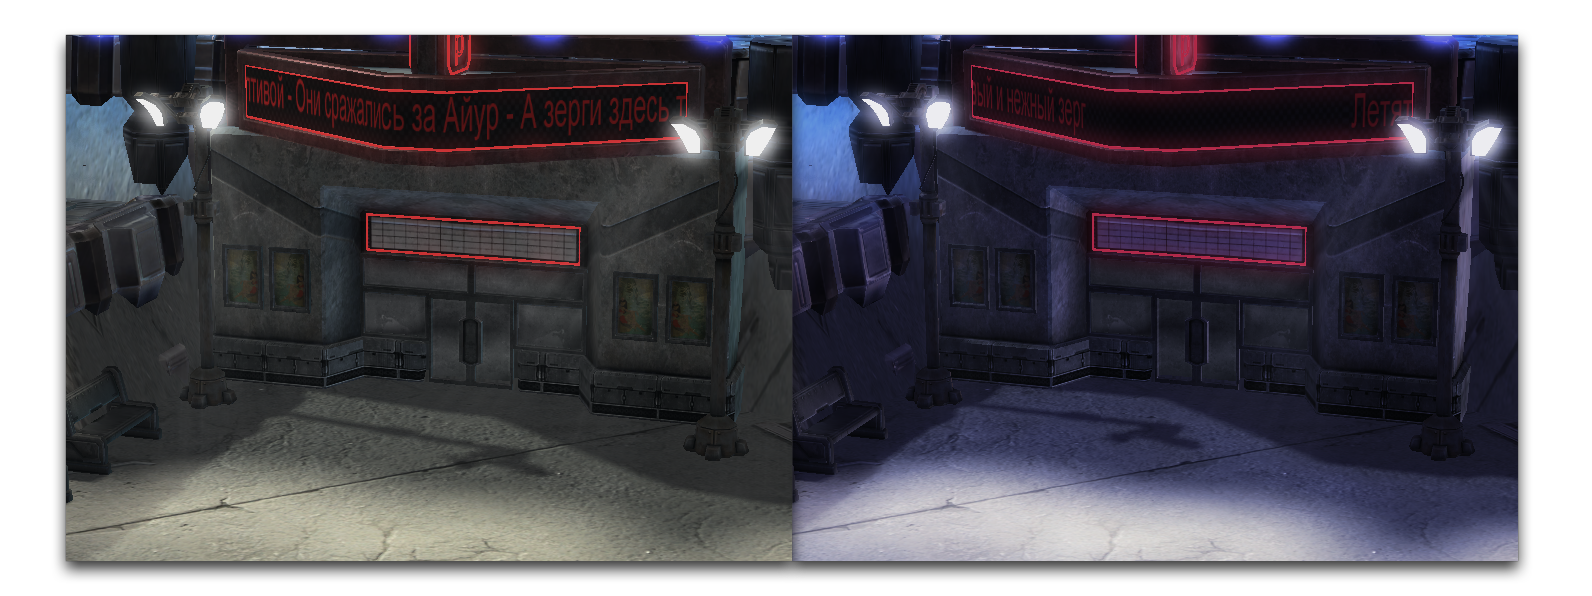 Lighting Changes
Now go to the Trigger Editor and open the ‘Initialization’ trigger. This trigger uses some actions that remove the game’s UI, reveal the map for view, and apply a standard camera. Add a new ‘Wait’ action by right-clicking under the ‘Actions’ heading and navigating to New ▶︎ New Action. Set the ‘Time’ field of this action to 2.0. Then add the ‘Set Lighting’ action, using the same procedure. Set the ‘Light’ field to ‘Mar Sara Day Test’ and change the ‘Blend Time’ to 6.0. This should leave you with the following.
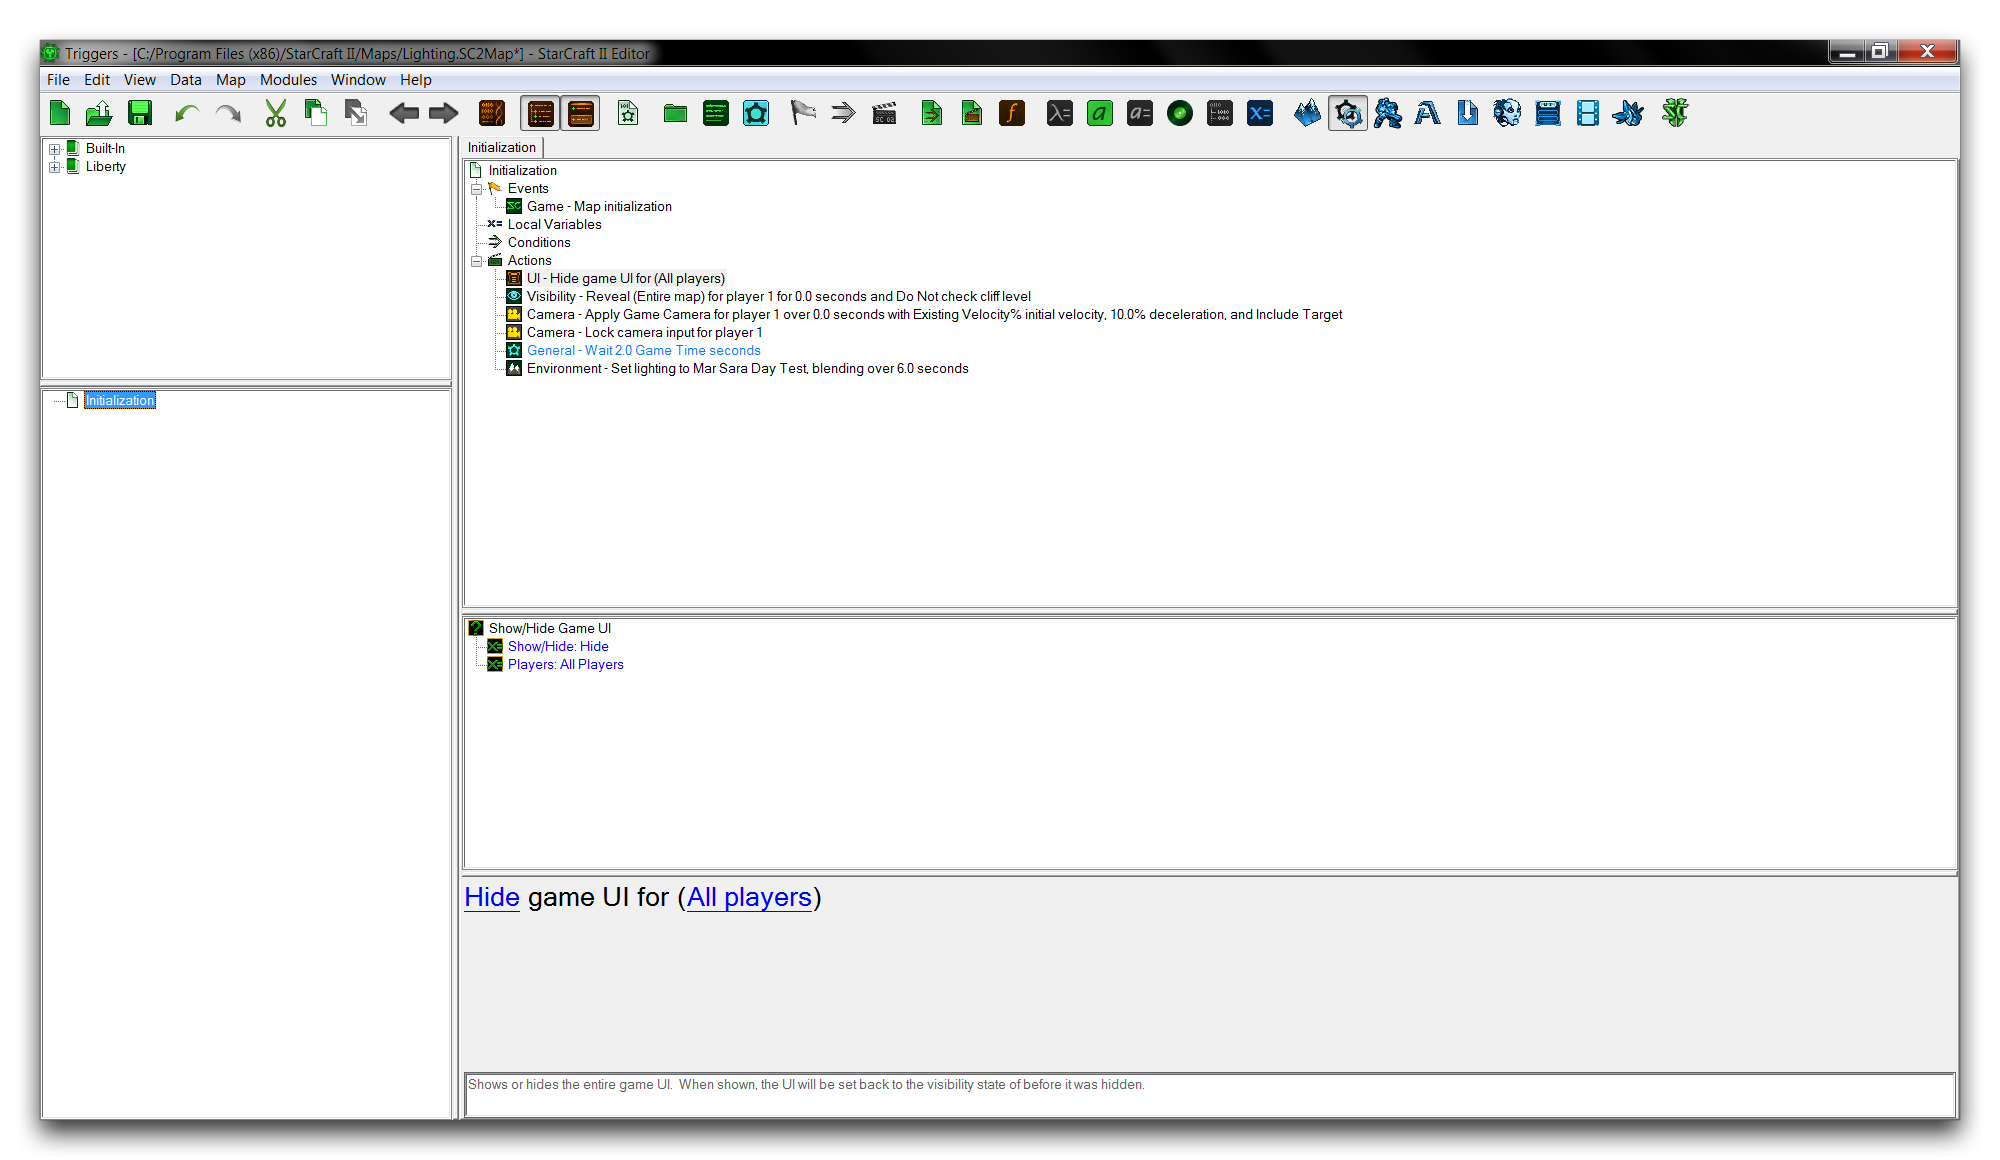 Prepared Trigger
The map is now complete. If you run a test, after a brief wait, the current lighting style, ‘Mar Sara Night Test’ will slowly change, blending into ‘Mara Sara Day Test.’ Giving a night-to-day lighting transition just like a sunrise. Launch the ‘Test Map’ function to see the result. It will slowly change the scene’s setting, similar to the sequence shown below.
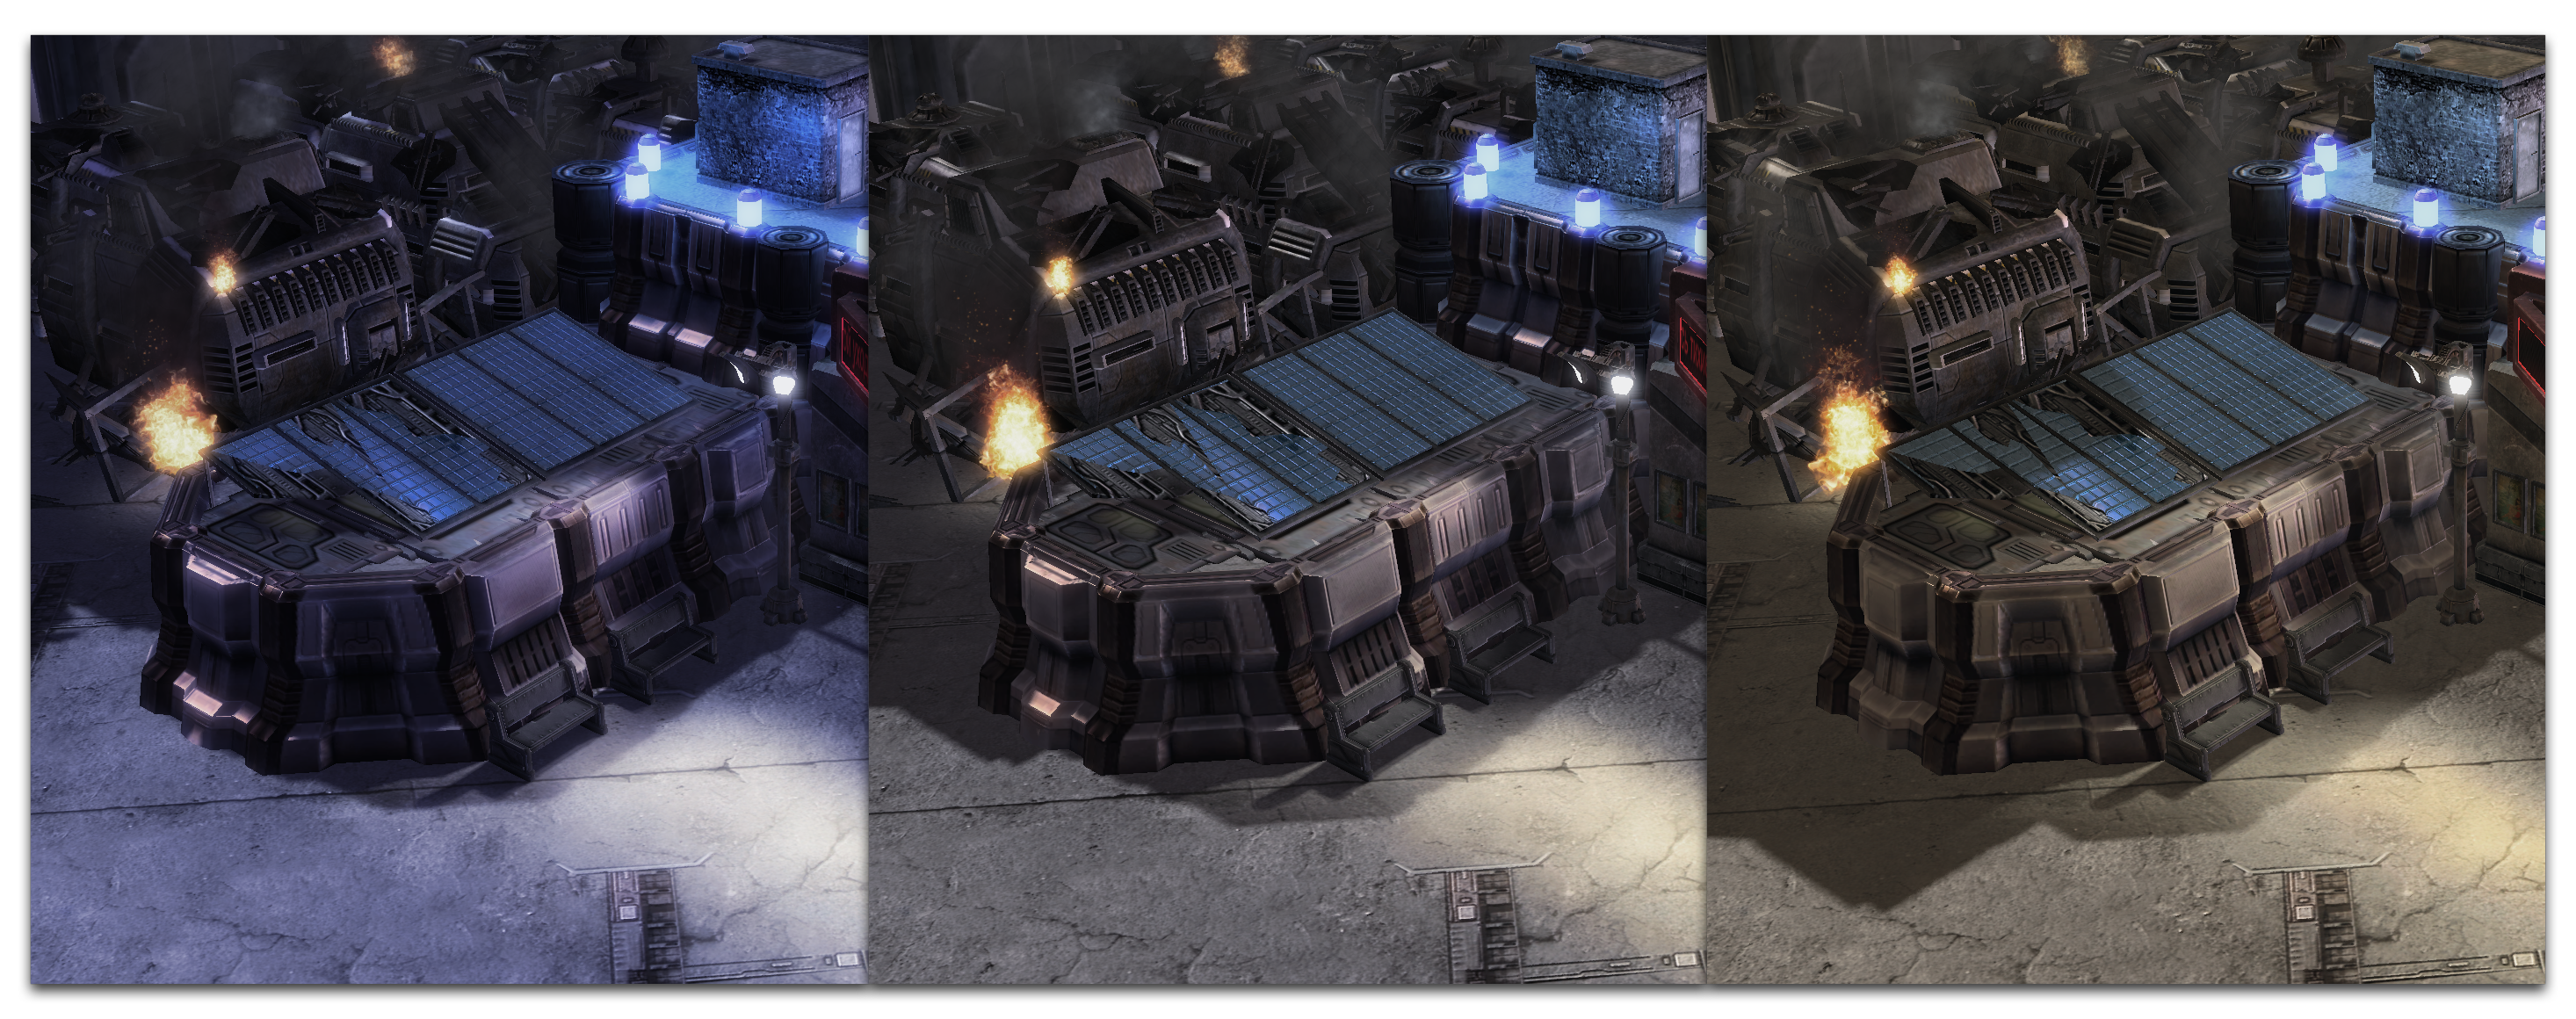 Lighting Changes Simulating a Sunrise