Display A Variable To The Screen
Directly outputting variables from the trigger editor to screen space can be very useful. You can use it as a technique for quick diagnostic spot checks when testing a new function or for conveying information directly as part of a simple UI.
This exercise will show you how to construct a basic counting timer, a type of variable, which will display to the screen.
Building A Dialog
With this method, the timer will be displayed on the screen using a dialog. You’ll begin by assembling both this dialog and the variable to be shown in it. Create a new document and start a melee map on any terrain type. Move to the Trigger Module and select the ‘Melee Initialization’ trigger. Delete the default actions from this trigger. Create a global variable of the type Timer, then name it ‘Tutorial Timer.’ From here, add the following actions, configuring them as described below.
- ‘Create Dialog,’ leaving the default settings.
- ‘Show/Hide Dialog Background,’ setting the ‘Visible’ term to ‘Hide.’
- ‘Show/Hide Dialog,’ setting the ‘Visible’ term to ‘Show.’
Your trigger should look like the one shown below.
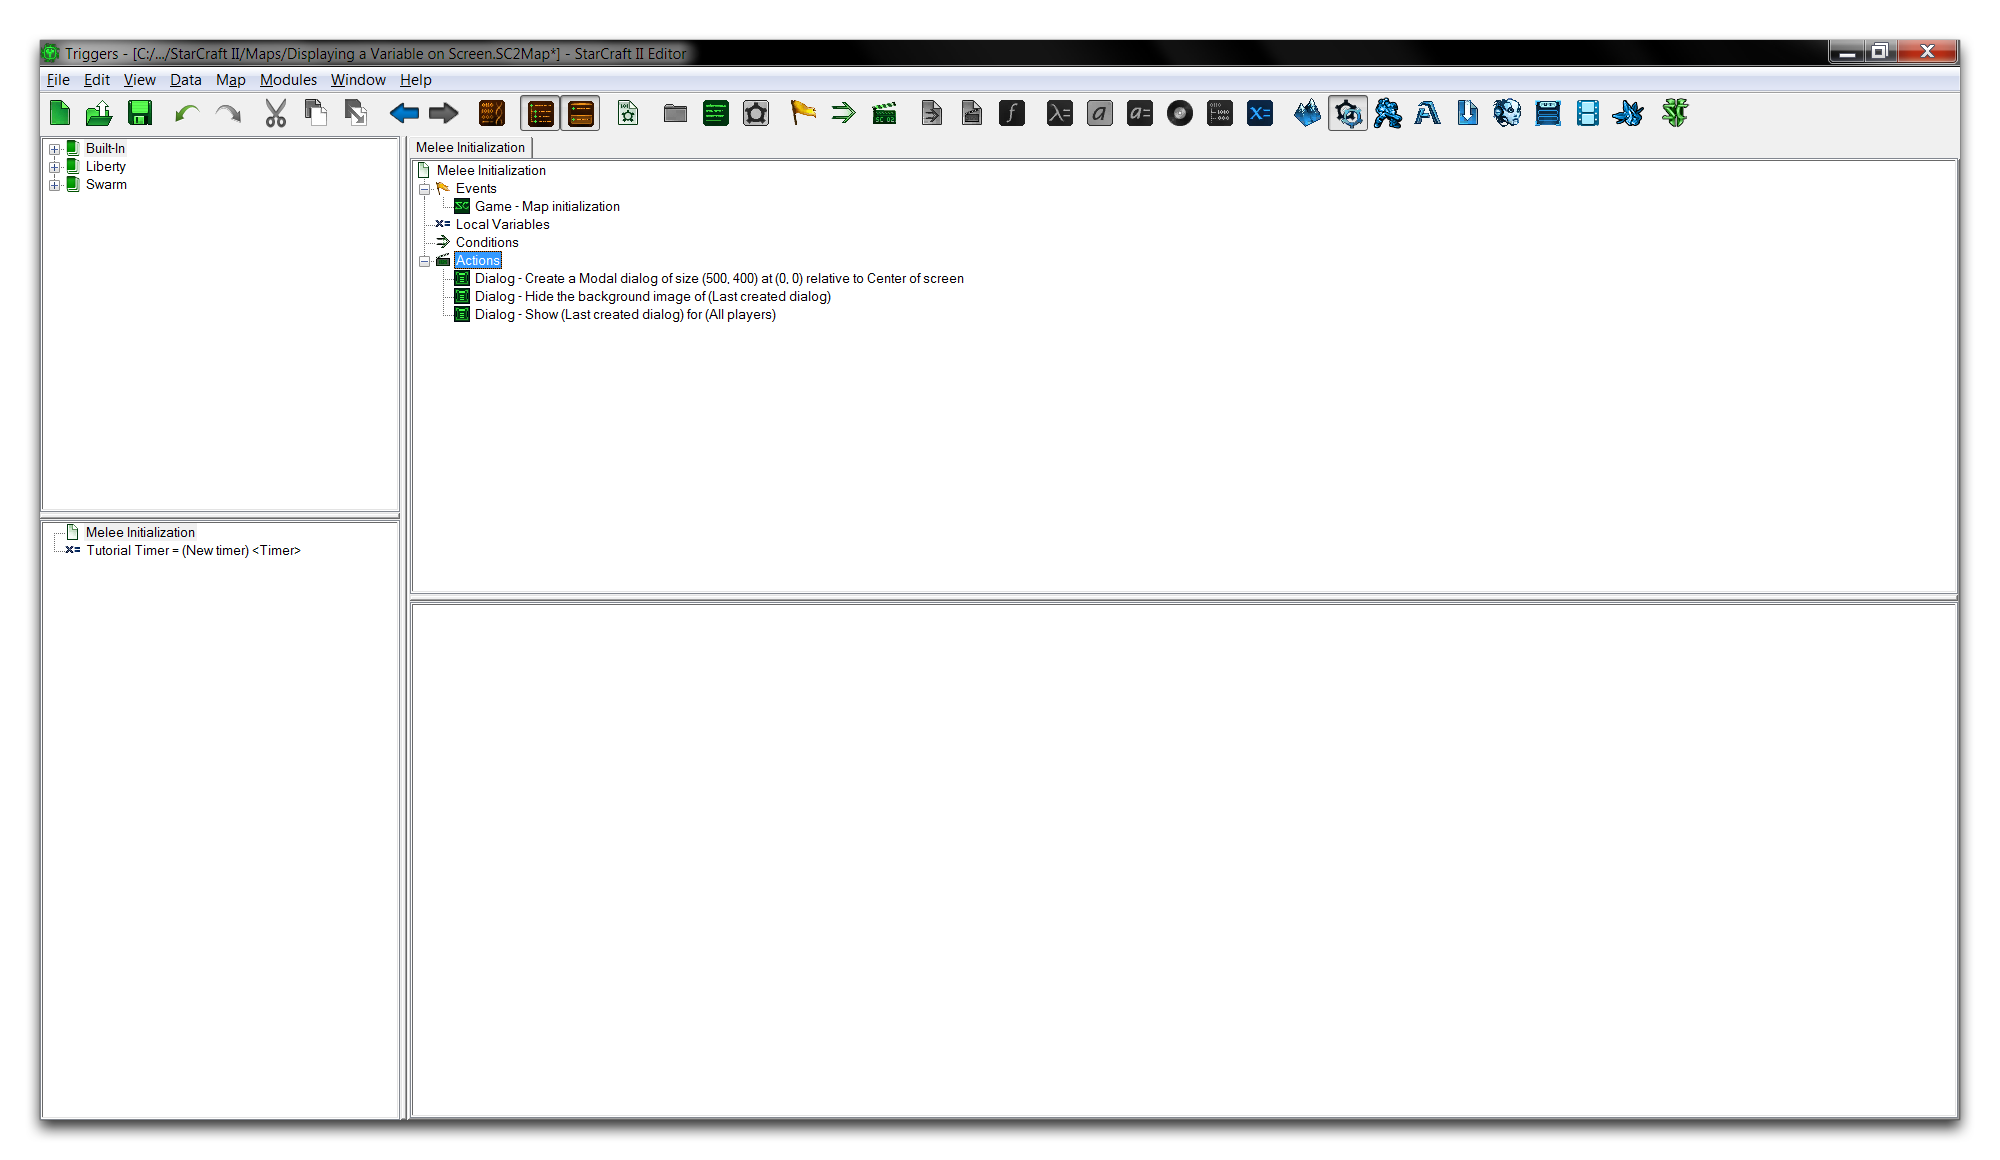 Base Dialog & Timer Variable Created
Creating A Label
From here, create a new action of the type ‘Create Dialog Item (Label)’ and change the terms ‘Offset X,’ ‘Offset Y,’ and ‘Text’ to Zero. Set ‘Anchor’ to ‘Center,’ and configure the ‘Writeout Duration’ to 0.0. Finally set the dialog dimensions to (200, 50).
This process has created the label, but it still requires a reference so that you can call on it easily later. Create a local variable for this purpose by navigating to Local Variables ▶︎ New ▶︎ New Variable. Name this variable to ‘Timer Label.’ Next, set the variable type to ‘Dialog Item’ so that it can properly hold the label.
Moving back to the trigger body, create a ‘Set Variable’ action and configure the value term to ‘Last created dialog item.’ Now is a good time to make sure that the ‘Set Variable’ action is ordered beneath the ‘Create Dialog Item’ action. This order ensures that the label was the last created dialog item at the time of ‘Set Variable’ action. This means that the label will be set to the newly created local variable, completing your reference. The trigger’s progress is shown below.
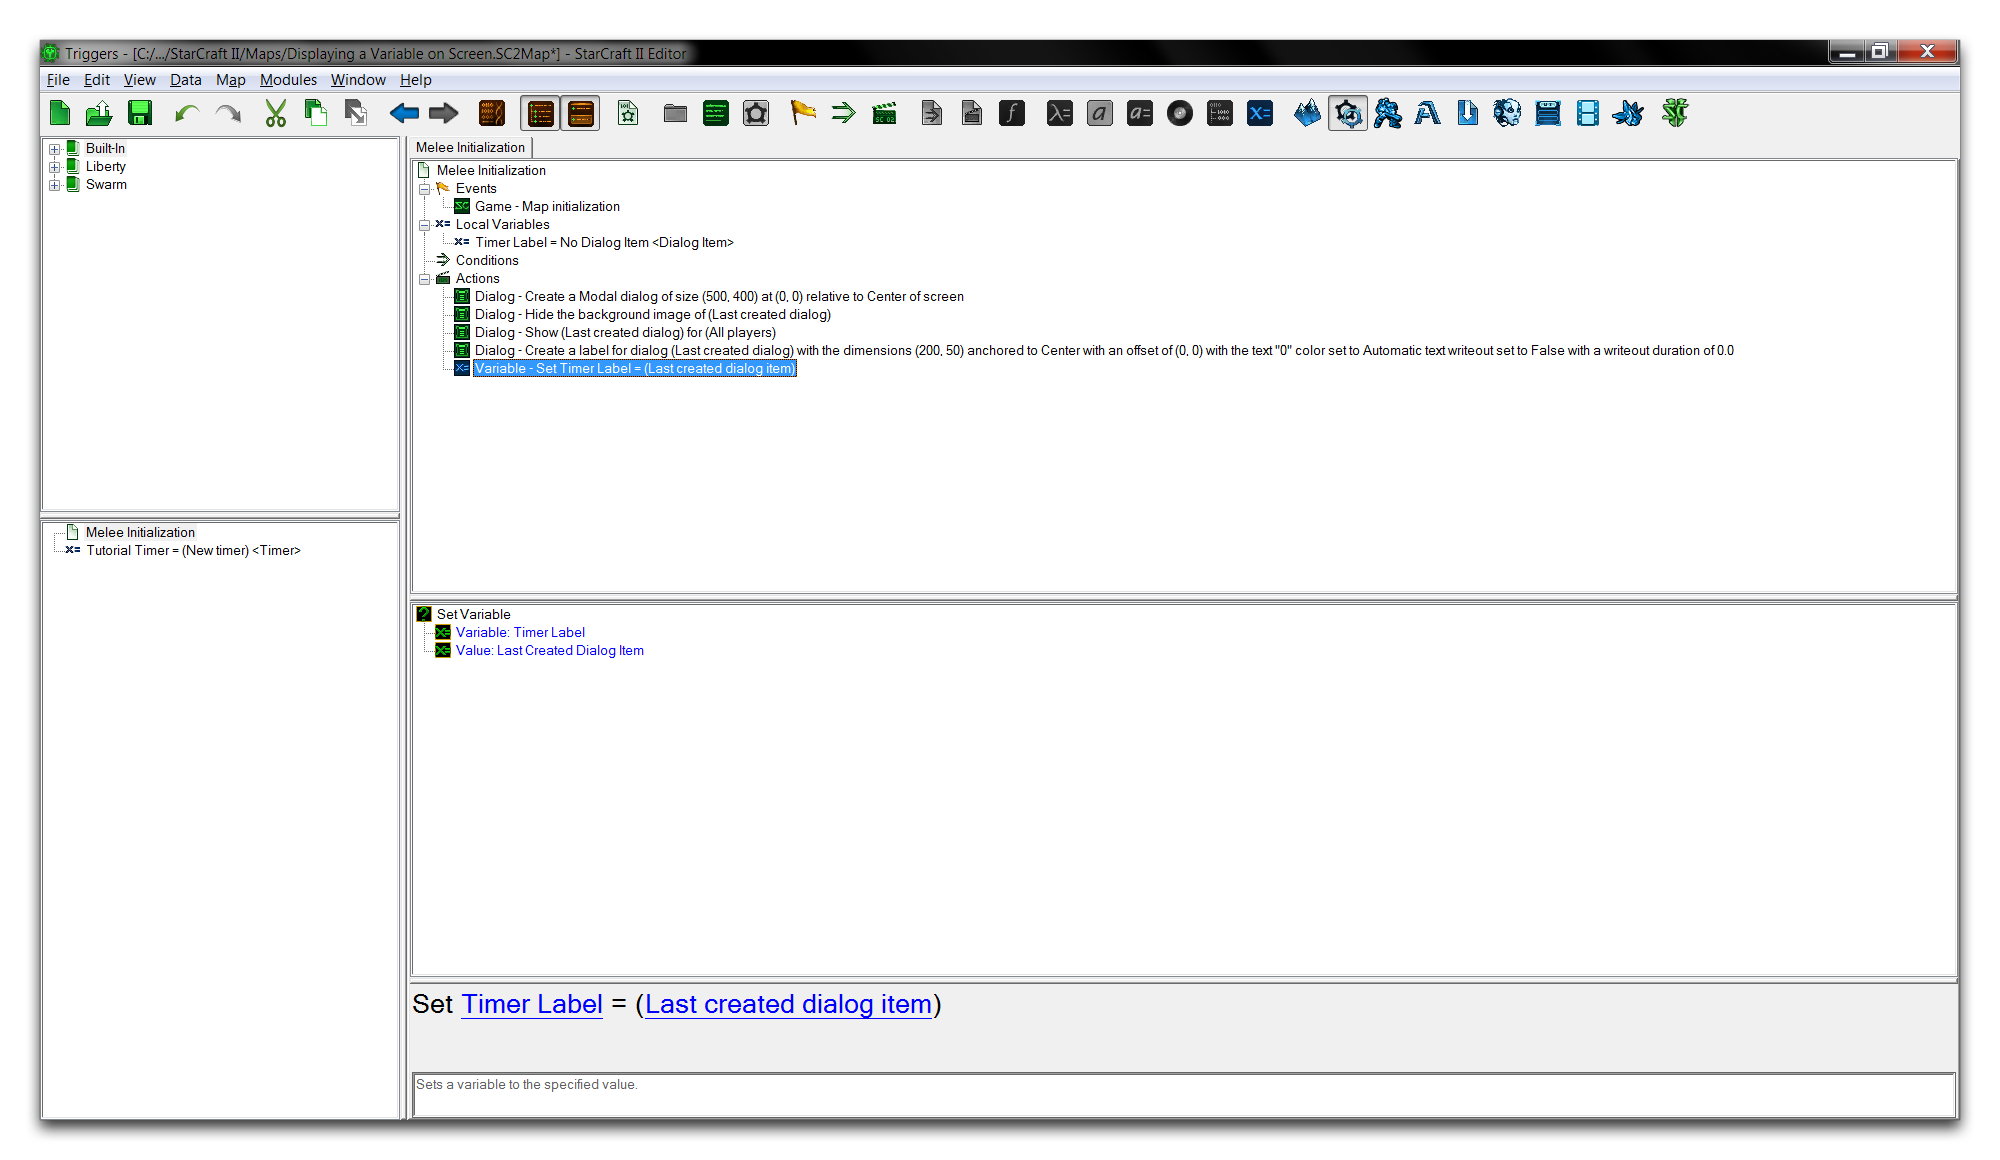 Dialog Label Hooked Up
Timer
Now you can move on to creating the timer that will be displayed to screen space. Continuing in the trigger body, create an action of the type ‘Start Timer.’ Set the action’s ‘Timer’ term to the ‘Tutorial Timer’ variable. Now configure the timer’s additional terms. Set the ‘Repeating’ flag to ‘Repeating,’ set the ‘Duration’ to 60.0, and set the ‘Time Type’ to ‘Real Time.’ This will configure the timer to continually reset after intervals of 60 real world seconds. It will also be bound to the ‘Tutorial Timer’ variable for functional reference.
Displaying The Variable
You’ll need to make some provision to constantly update the dialog label with the timer’s value. This is a common use of control statements, and in this case you’ll find a loop appropriate. Assemble a loop by creating the action ‘Repeat Forever.’ In the body statement of the loop, denoted by a new ‘Actions’ heading, create the action ‘Set Dialog Item Text.’
Note that, due to the function inputs, the prepared label must output to the screen in the ‘Text’ type. Since our timer is counting in a ‘Real’ type, a conversion is necessary. Click the ‘Text’ term of the ‘Set Dialog Item Text’ action. This will launch a window showing potential functional input. Navigate to ‘Conversion’ in the left-hand subview to see a list of possible conversion functions.
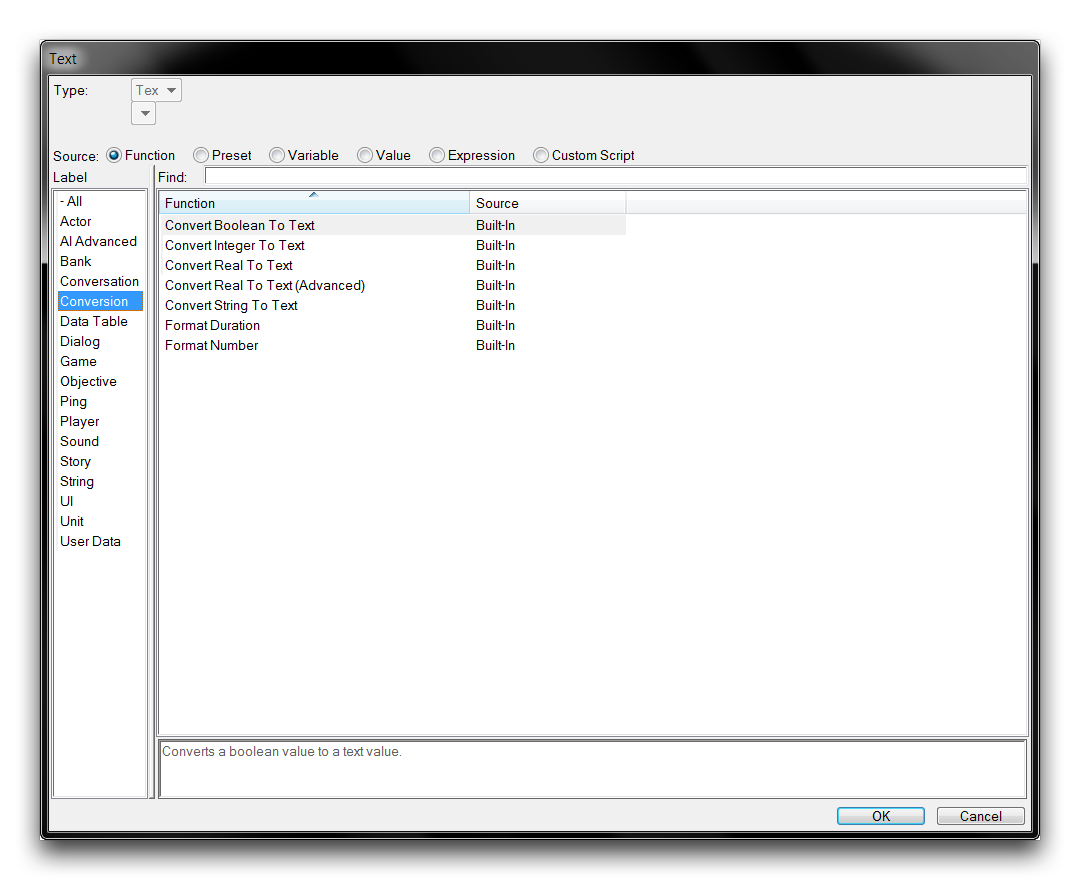 Text Conversion Options
The ‘Convert Real to Text’ option is appropriate here. Select it, then click ‘OK’ to return to the trigger view. This function still requires an input, so select the ‘Value’ term and set it to ‘Remaining Time of Timer’ to give it that property. Once you’ve done that, set the timer to the variable ‘Tutorial Timer.’ Your trigger should now be complete, compare your result to the image below.
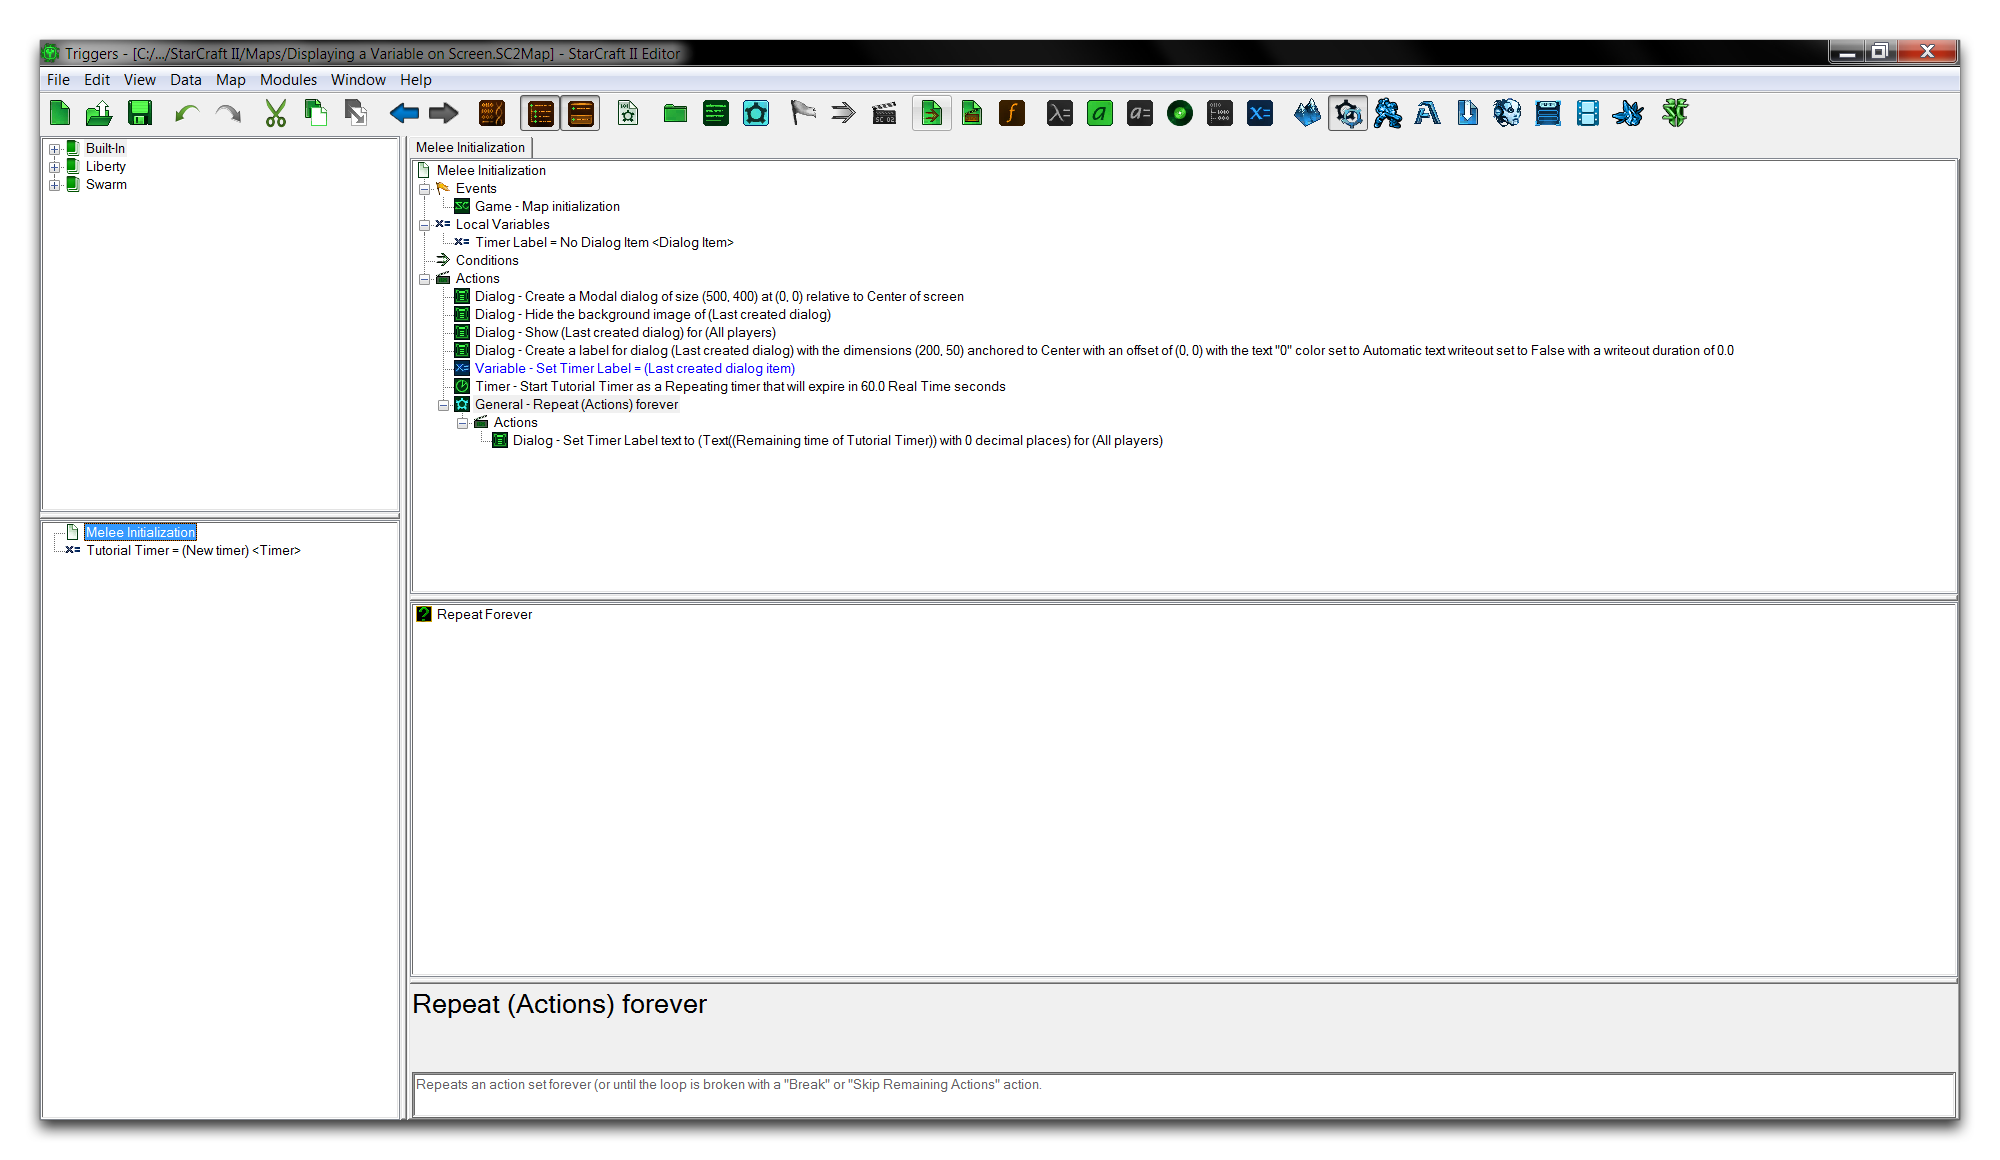 Completed Trigger
You can now launch the ‘Test Document’ and note your result. You should see the timer variable displayed to screen space, as shown below.
 Timer Variable Displayed on Screen