Range Actors
Range Actors are used to draw range indicators on the map. A range actor is a visual actor with a narrow purpose that sees frequent use in StarCraft’s melee game. In this capacity, range indicators mark a lot of distances relevant to gameplay, including the casting range for a ghost’s snipe, the vision ranges for an observer’s detection, and perhaps most famously the shelling range for a siege tank.
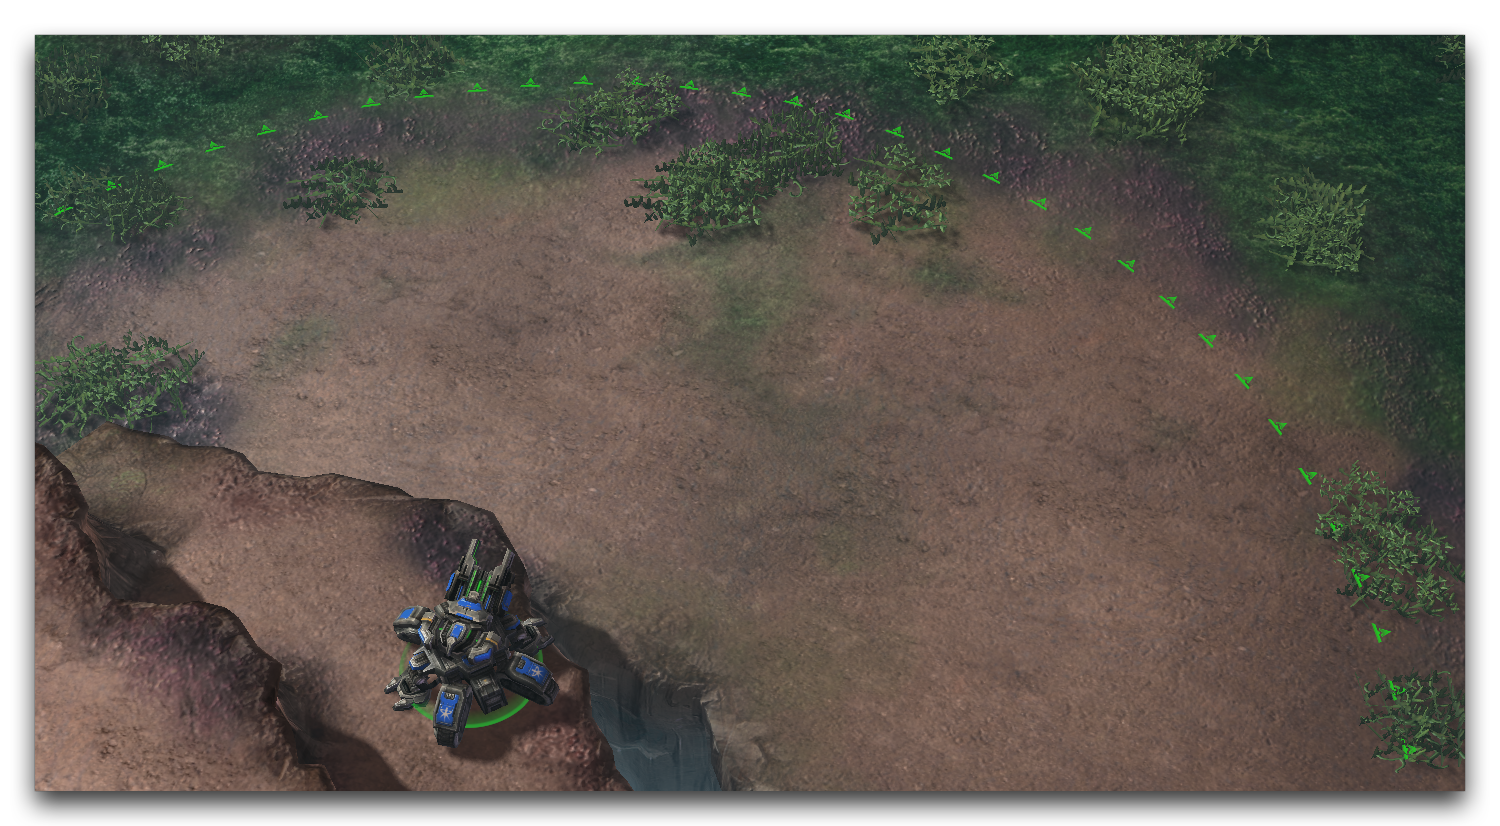 Siege Tank Range Actor
In actuality, range actors don’t draw range indicators. Instead, they draw a circularly patterned texture on the map, which then operates as a range indicator. The distinction is made here so that you understand that range actors can be used in other ways. It’s important to have a full understanding of what the actor is actually doing so that you can both configure and employ it.
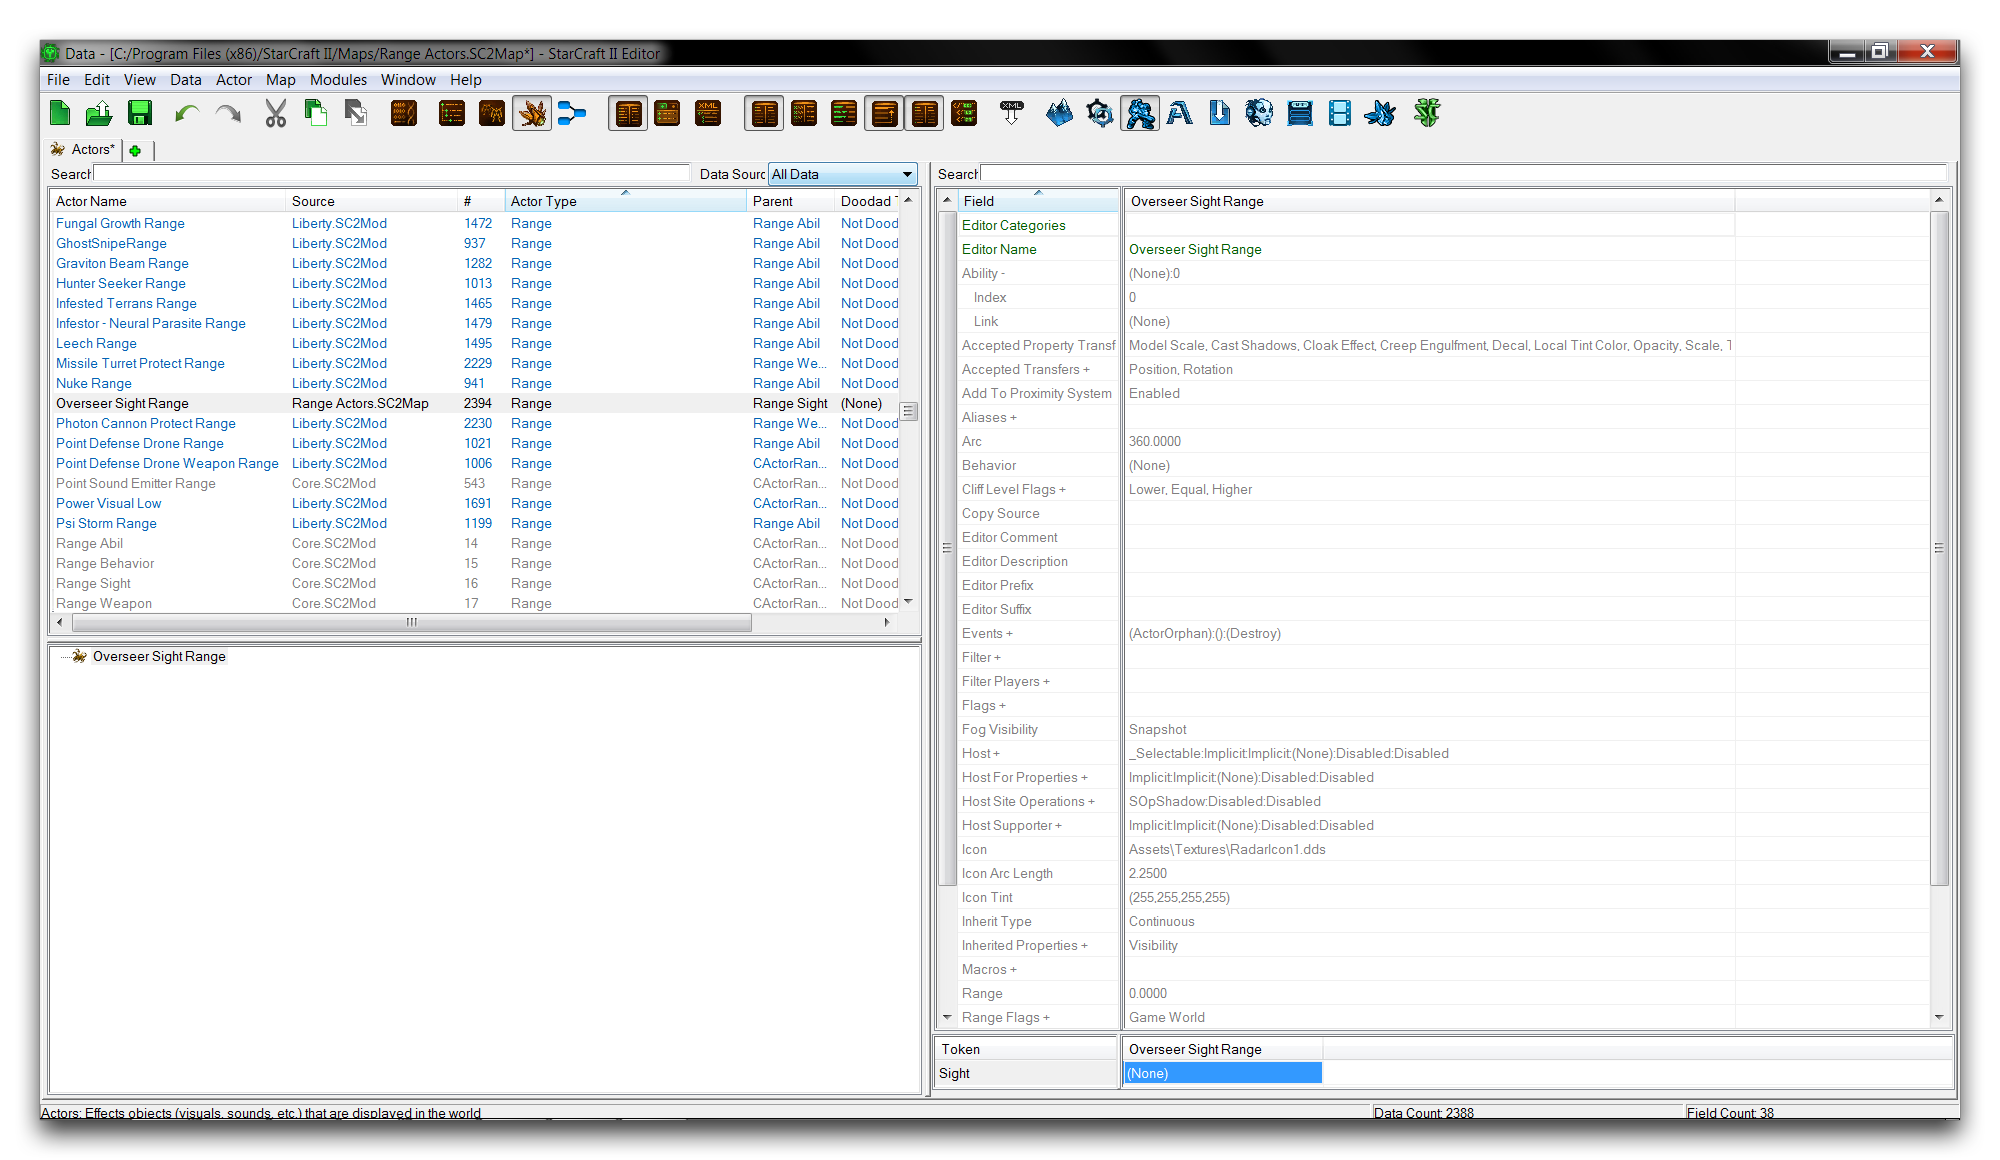
You can set the visibility of range actors in the Terrain Editor by navigating to View ▶︎ Show Terrain ▶︎ Show Range. You can find range actors in data, under the actors tab, with the type ‘Range,’ as shown below.
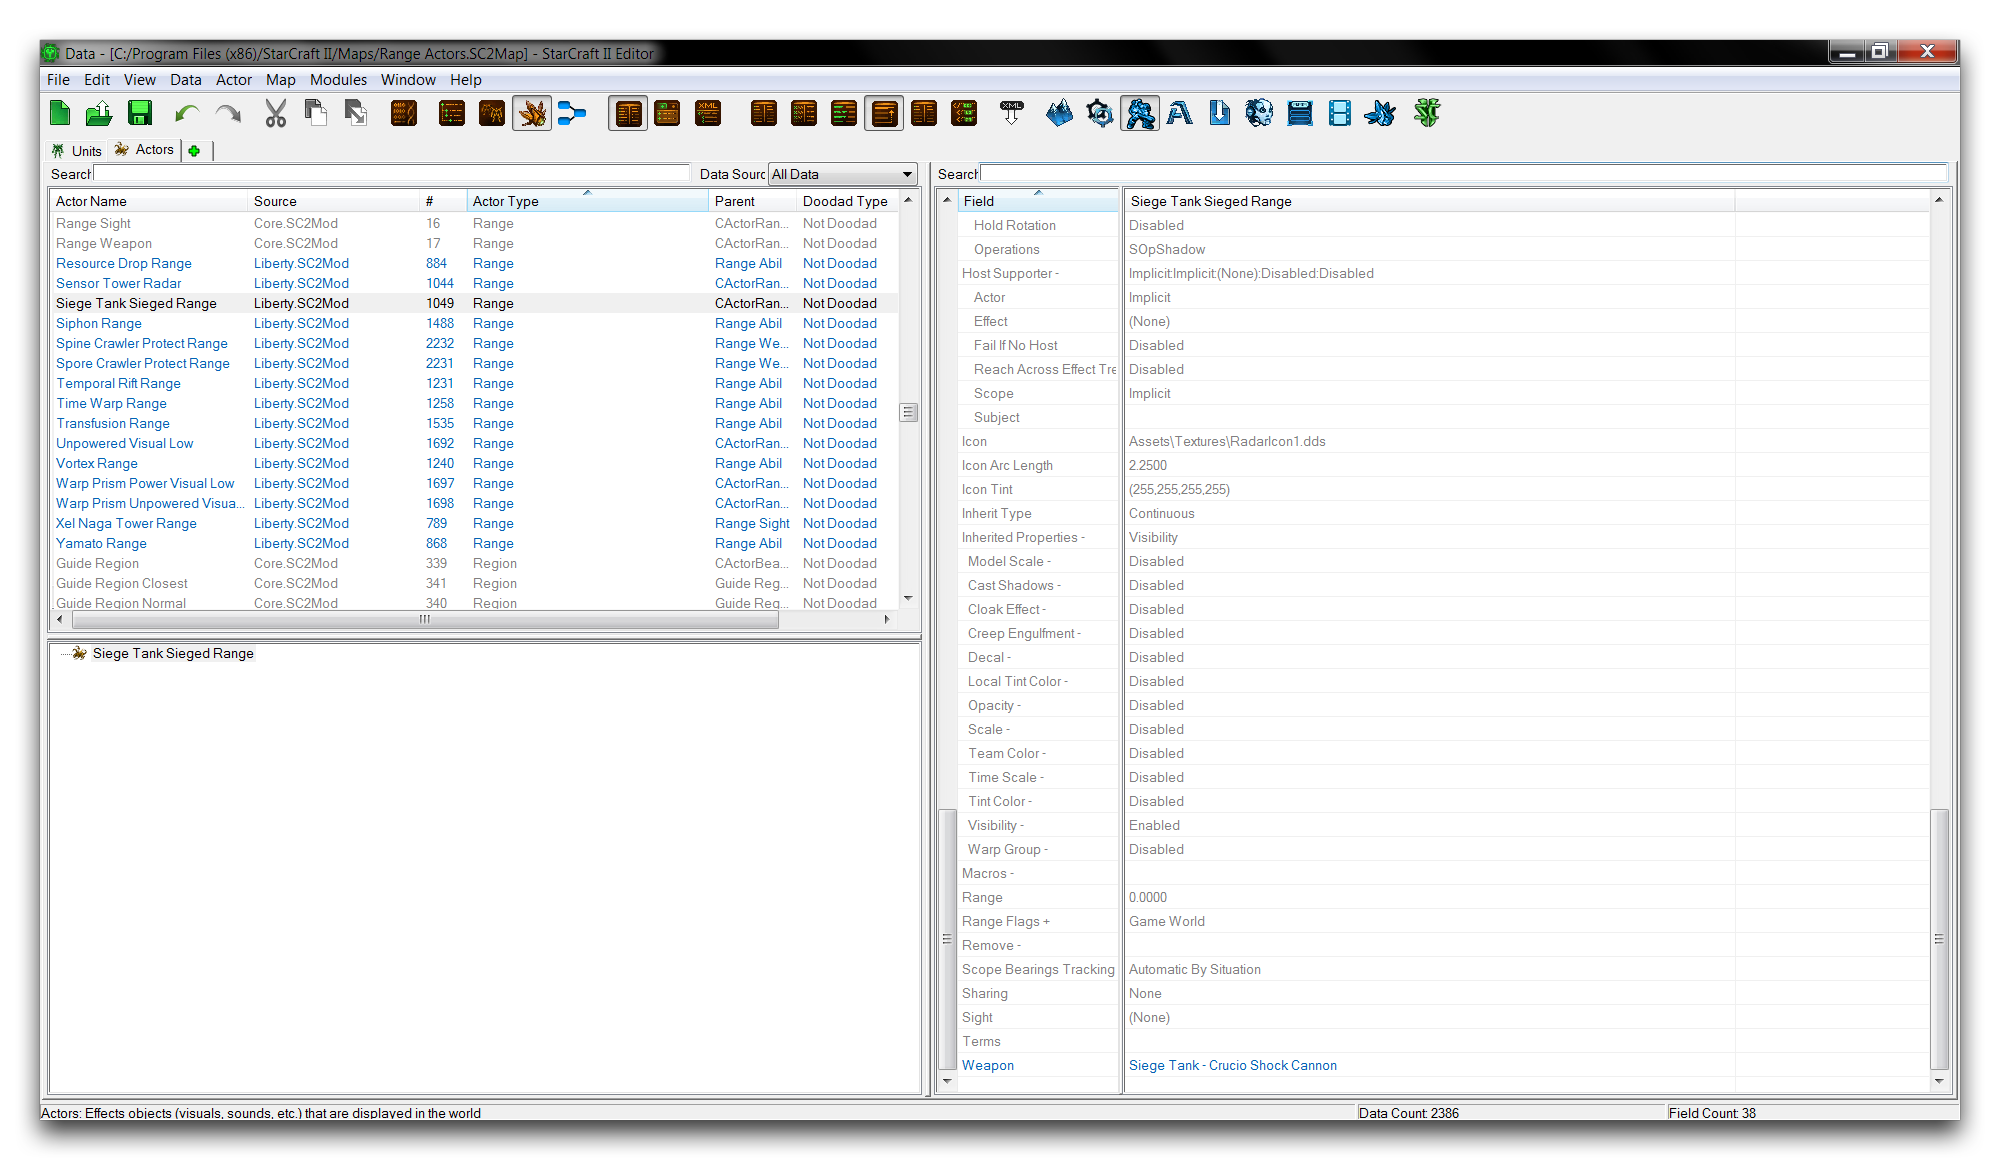 Range Actors Listing
Range Actor Details
Range actors have a large number of fields due to their parentage from actors. However, the reality is that you’ll only be using the most useful of those fields. Range actors’ most useful fields are broken down in the following table.
| Field | Details |
|---|---|
| Ability | Links the actor to an ability and receives a Range value from it. |
| Arc | Sets the fraction of a circle, or the arc, over which the texture will be patterned. Values are between 0 and 360. By default, indicators draw a full circle or 360. The arc begins directly in front of the unit and widens equally in both directions. |
| Behavior | Links the actor to a behavior and receives a Range value from it. |
| Cliff Level Flags | Sets how the range actor will project its texture to other cliff levels. Checking Lower, Higher, or Equal will display the texture onto those levels. |
| Sight | Links the actor to a unit and receives a range value from its Sight Radius field. |
| Weapon | Links the actor to a weapon and receives a Range value from it. |
| Icon | Sets the texture to be patterned onto the map. Note that all default range actors use the RadarIcon1 texture. |
| Icon Tint | Applies a tint to the Icon texture. |
| Icon Arc Length | Sets the spacing at which the Icon is patterned. The spacing value is a measurement in units of the arc between individual icons. |
| Range Flags | Contains two flags, Game World and Range Flag Minimap. The former sets whether the actor displays within the main game, while the latter sets if the actor will display a scaled version to the minimap. |
| Events | Sets the actor events. Range actors use events to create and remove themselves, as well as control visibility behavior. |
| Range | Directly sets the radius at which the textures are patterned. Do not use this in conjunction with the Ability, Behavior, Sight, or Weapon fields. |
As noted above, there are several fields that allow you to customize the appearance of range actors. These properties go largely ignored within the default data dependencies. This is because traditional StarCraft typically uses range actors as a communication tool. A result, their appearance is kept consistent across all units to avoid player confusion. Nevertheless, these fields may still offer creative options for developers.
Range Actors Messages
The table below contains a breakdown of the events and messages pertinent to a range actor’s.
| Message | Description |
|---|---|
| Create | Creates the range actor, displaying the indicator the map. |
| Destroy | Destroys the range actor, removing the indicator from the map. |
| RangeUpdat e | Commands the actor to recheck its Range value from its source. Since the Range value is set on actor creation, this can be useful if a host’s properties have changed. |
| Ability | Used to apply the actor while an ability is actively targeting. |
| TargetOn | |
| Ability | Used to remove the actor after targeting has finished. |
| TargetOff | |
| SelectionL ocalUpdate Start | Used to apply the actor while a unit is selected. |
| SelectionL ocalUpdate Stop | Used to remove the actor when a unit is unselected. |
Range Actor Types
There are four base types of range actors used for parentage, Range Abil, Range Behavior, Range Sight, and Range Weapon.
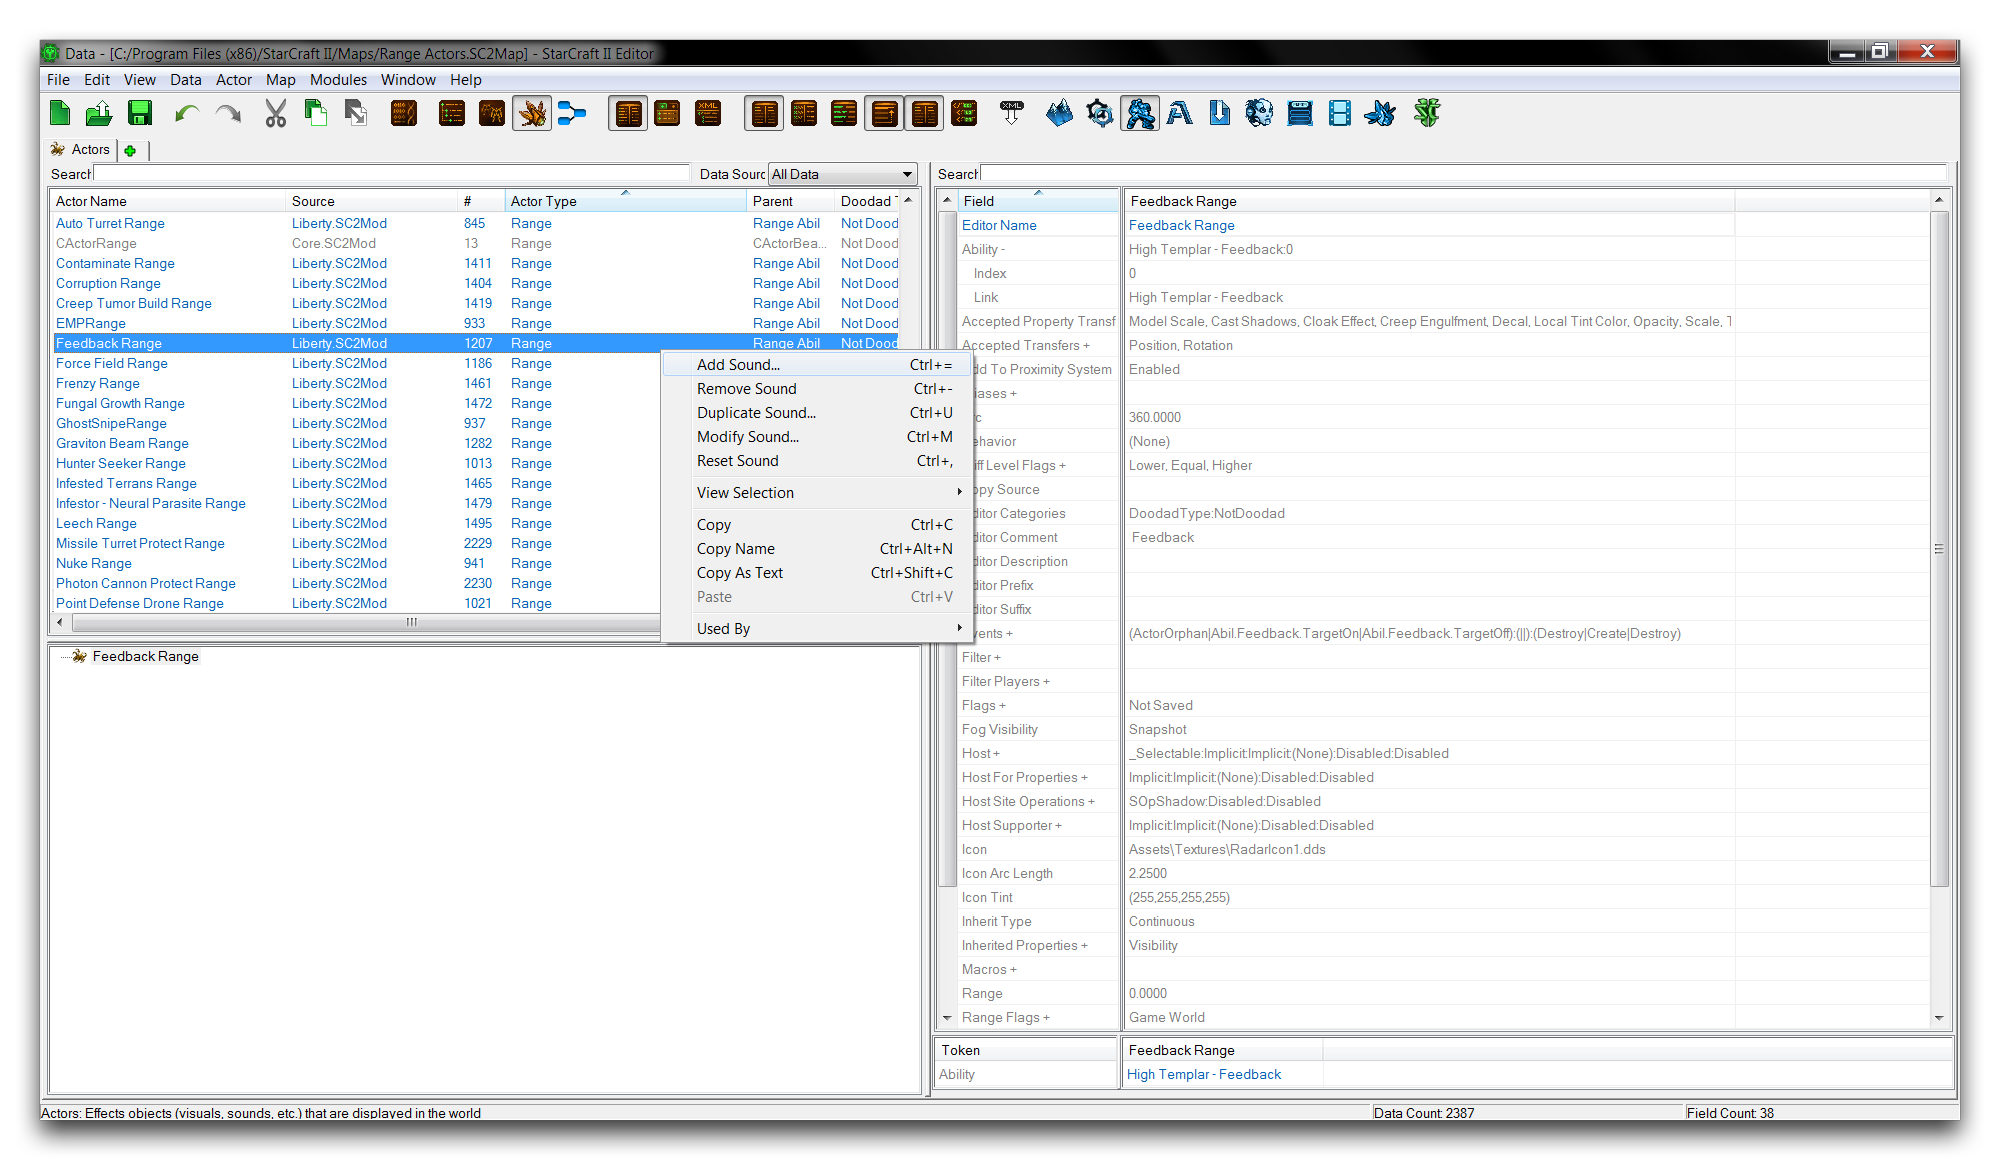
Range Abil is a basis for range actors designed to provide a range indicator for targeted abilities. It supports an Ability token, linking to which will set the actor’s Range field to that of the token. The token also provides an actor events template, which links the range actor’s creation and removal messages to the Ability token’s targeting inputs. This template is shown below.


Range Behavior is a basis for range actors designed to provide a range indicator for Radar Range or Detect Radius Behaviors. It supports a Behavior token, linking to which will set the actor’s Range field to that of the token. The token also has an actor events template, which will create and remove the actor based on the Behavior token’s on or off status. This template is shown below.
Range Sight is a basis for range actors designed to provide a range indicator for sight radii. It supports a Unit token, linking to which will set the actor’s Range field to that of the token. Range Weapon similarly accepts a Weapon token, setting the Range of the actor to that of the token. Note that these last two base types do not contain actor events, and require the range actor’s create and destroy events to be set before they can be considered operational.
Demoing Range Actors
Now, open the demo map provided with this article. The course features an overseer floating above a set of cliff faces, as shown below.
 Demo Map Course
The overseer is a unit from StarCraft known for its detection ability. It reveals invisible units at a certain distance in a circular radius around the overseer. In this map, there is no indication of this range, either passively or on selection of the overseer. You can apply some range actors to change that, giving the player a better impression of the overseer’s utility at a glance.
To do this, move to the Data Editor and then into the actors tab. If the tab isn’t already available, open it by navigating to + ▶︎ Edit Actor Data ▶︎ Actors. There, create a new actor by right-clicking in the main view and selecting Add Actor, as shown below.
 Creating an Actor
This will launch a popup that you can use to set the details of the actor being created. Name the new actor ‘Overseer Sight Range,’ then hit ‘Suggest’ to generate an ID. Use the ‘Actor Type’ dropdown to set that type to Range, then set the ‘Parent’ to Range Sight. This declares the actor as the needed range actor, while giving it a base type that will help with some of the work later. The creation window should now appear as shown in the image below.
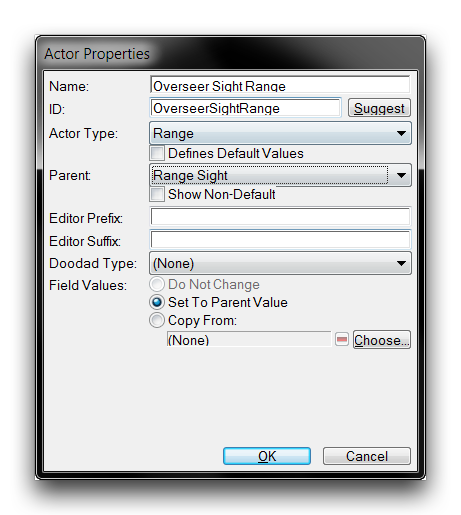 Range Actor Prepared for Creation
Click ‘Ok’ to create the range actor. This will take you back to the main Data Editor view. From there, highlight the ‘Overseer Sight Range’ actor to open its fields. You’ll see that, due to its parentage, this actor has a token at the bottom of the fields listing. Inputting a Unit type as this token will allow the new range actor to draw some of its properties from the existing unit. Select the token field, as shown below.
 Range Actor Token Field
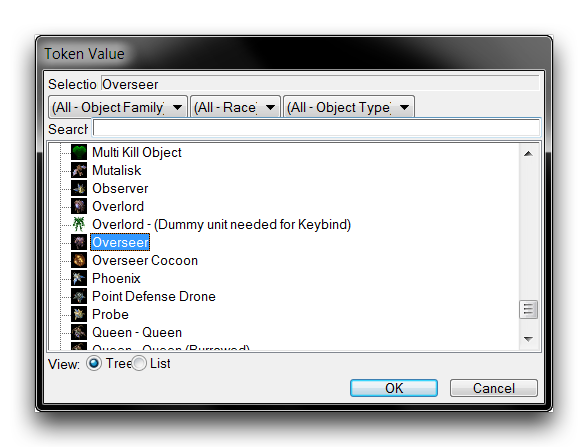
Opening this token field will allow you to set a unit, which will have its Sight value pulled to be used as the range actor’s Range. Do so by double clicking on the token field. This will present you with the following view.
 Token Selection
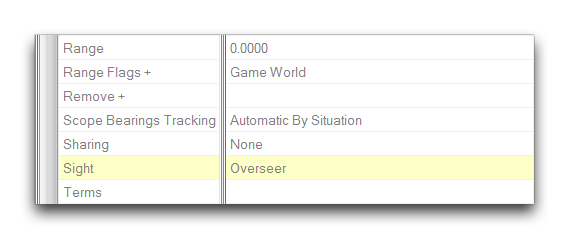
Selecting a unit in the token popup will set that unit’s Sight as the distance the indicator will be drawn at. Since this range actor is being designed to show the overseer’s vision range, select the ‘Overseer’ here. It’s worth pointing out that any other unit with the same sight range could still work here and accurately portray the overseer’s vision. However, inputting the actual overseer itself allows this range actor to be updated should that vision value change for any reason. This is good design. Clicking ‘Ok’ in the token popup will update the actor. The ‘Sight’ field should now look like the image below.
 Token Selection
The Sight field has been autofilled. You may also have noticed that the Range value will not display within the actor. The values are linked directly to the unit, meaning that the ‘Range’ field is now a manual override. In general, you shouldn’t use this alongside a token.
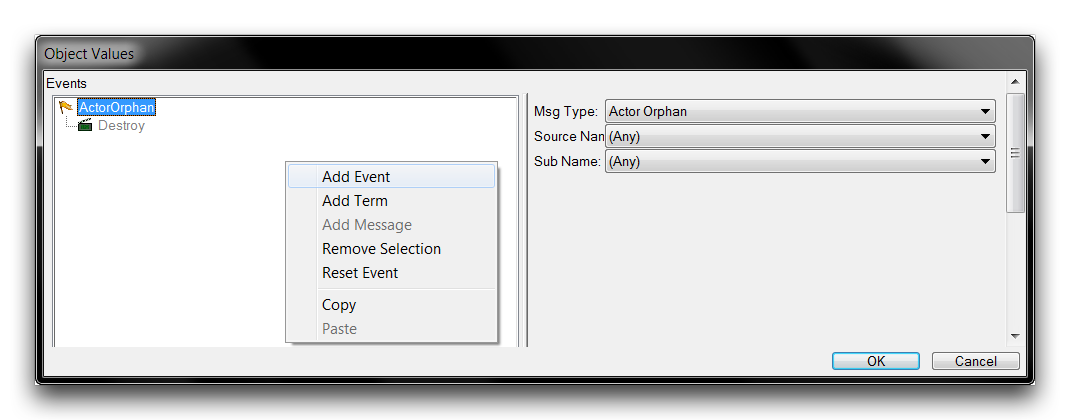
Now, navigate to the ‘Events’ field and double click to launch the actor events subeditor. There should be only a single ‘ActorOrphan’ event, responsible for cleaning up the range actor if it ends up orphaned in the Editor. Right-click inside the white box and select ‘Add Event.’
 Actor Event Creation
Set the new event’s ‘Msg Type’ to ‘Unit Birth’ and its ‘Source Name’ to ‘Overseer.’ Then set its message to ‘Create.’ This process is shown below.
 Setting Creation Event
This combination of event and message will create the range actor when the overseer is created. This means that the range indicator will always display with the overseer. Next, create another event and set its ‘Msg Type’ to ‘Unit Death.’ Also set its ‘Source Name’ to ‘Overseer’ and its message to ‘Destroy.’ This will destroy and remove the range indicator when the overseer is destroyed. The completed actor events should look as follows.
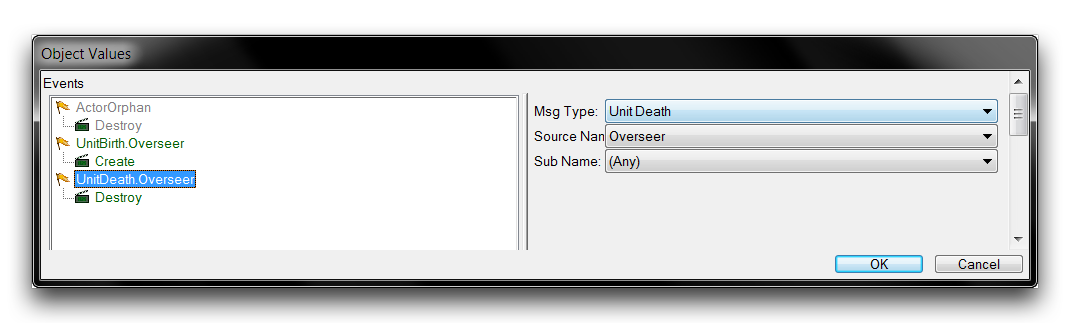 Completed Actor Events
Click ‘Ok’ to save the actor events, then return to the main Data Editor view. At this point, the range indicator should already be functional, but you can make a slight alteration to improve visibility. Select the ‘Icon Arc Length’ field and set its value to 1.125. This halves the base value, which will result in twice as many range indicators being shown in the circle.
If you test the range actor now, you should get a succesful result. However, to better illustrate the effects of these actors, the next step is to build a second range indicator and attach it to the Overseer. You can do this quickly by selecting the ‘Overseer Sight Range’ actor, then right-clicking and selecting ‘Duplicate Actor.’ This will present you with the following view.
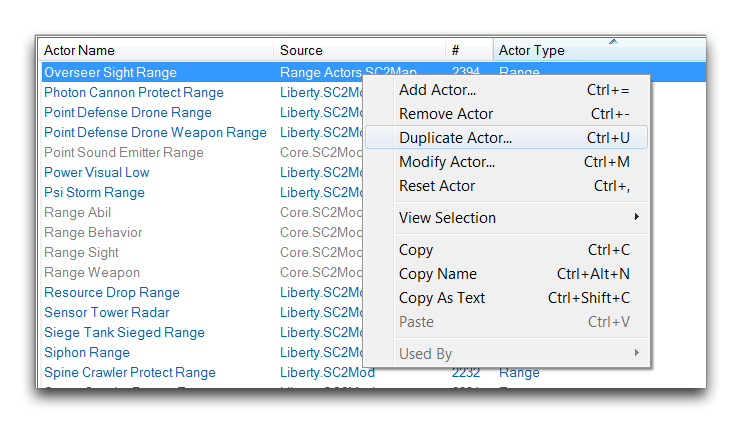 Duplicating Range Actor
This will launch a ‘Duplicate Actor’ window, with a single ‘Overseer Sight Range’ value.
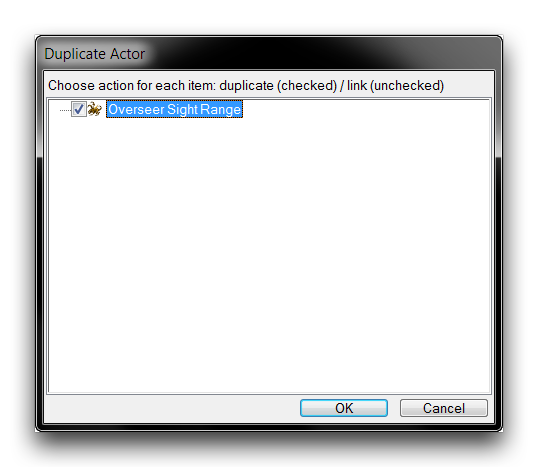 Duplication Window
Duplicating actors can be very messy, as they will also clone many of their connected actors. In this instance, the range actor is an isolated, single purpose actor, so you can feel free to duplicate it. Make sure that the ‘Overseer Sight Range’ value is selected in the window, then click ‘Ok.’
This will duplicate the actor into the Editor as ‘Overseer Sight Range Copy.’ Highlight this new actor and double click it to change its properties. In the ‘Actor Properties’ window that this launches, set the actor’s name to ‘Overseer Sight Facing,’ then click ‘Suggest’ to generate an ID. Confirm the window’s values with the image below, then click ‘Ok.’
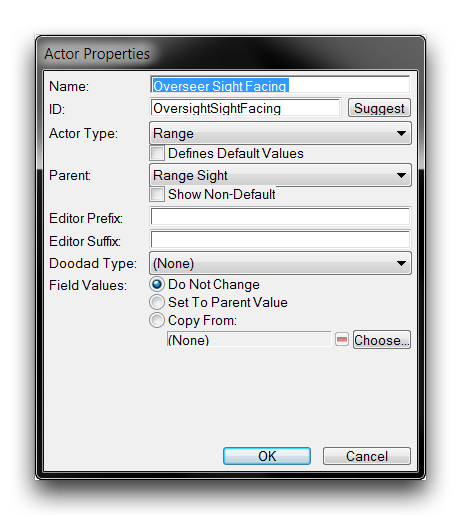 Duplication Window
Highlight the ‘Overseer Sight Facing’ actor, select its ‘Arc’ field, and change the value to 90. This actor will now only project a quarter of a circle in front of the Overseer, emphasizing the direction the unit is facing. Highlight the ‘Sight’ field, right-click it, and navigate to Reset to Parent Value ▶︎ [Core.SCMod] CActorRange. You can see this procedure being carried out in the image below.
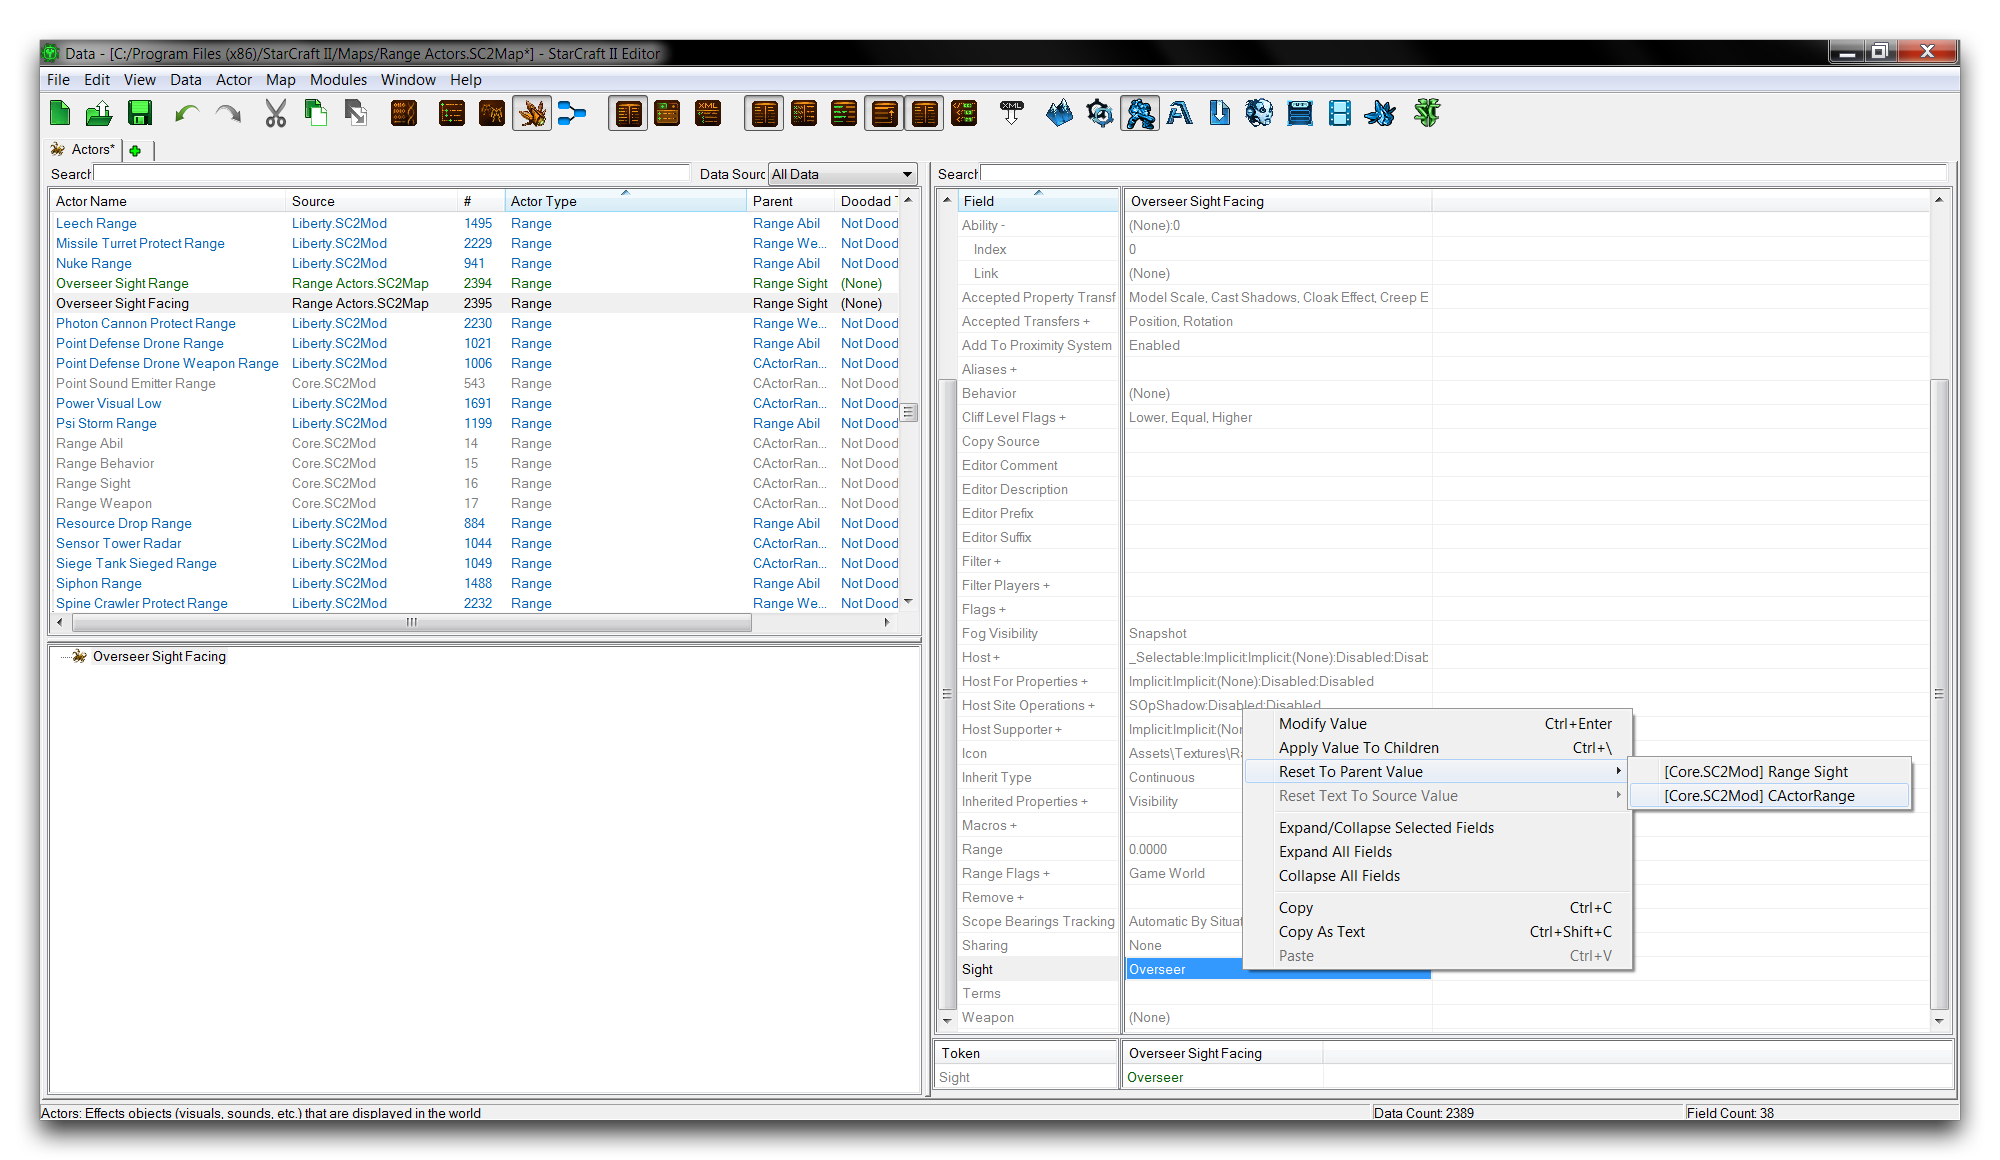 Resetting Actor Sight Field
This has unlinked this facing actor’s range from the overseer token. Now, create a new value by selecting the ‘Range’ field and setting its value to 8. This will allow you to differentiate between it and the ‘Overseer Sight Range’ indicator. Otherwise, the both indicators would be drawn at the same Range and just overlap.
For the final step, select the ‘Icon Tint’ field and double click it to launch an ‘Object Values’ window. Click the colored box to open a color picker. Set the color to yellow, or R255 G255 B0, and click ‘Ok.’ Leave the Alpha value as 255 and click ‘Ok’ to finalize the icon tint.
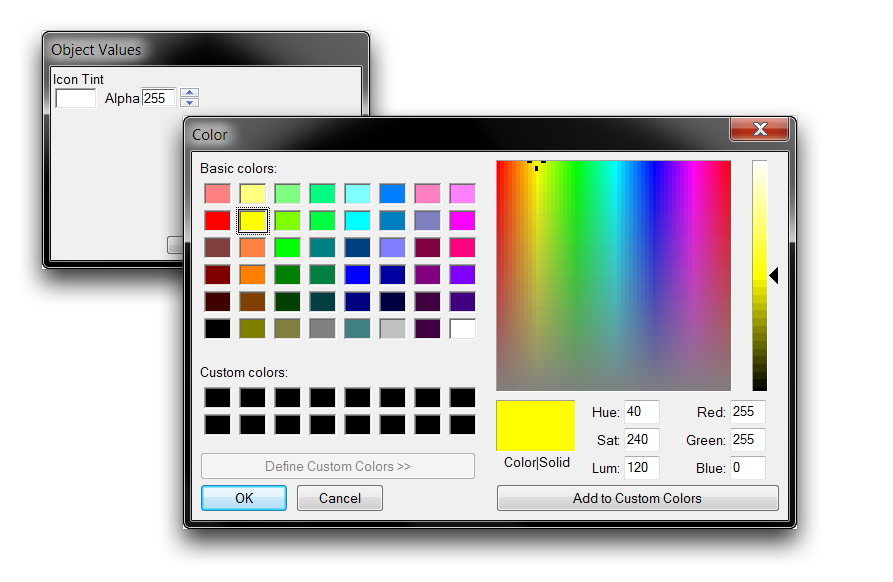 Selecting the Icon Tint
At this point, confirm the fields in the constructed actors below. The ‘Overseer Sight Range’ actor is displayed on the left, while the ‘Overseer Sight Facing’ actor is on the right.
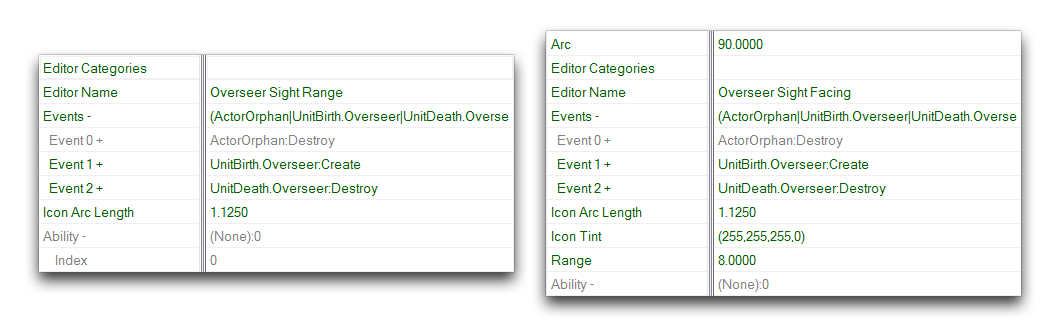 Overseer Sight Range Fields – Overseer Sight Facing Fields
The map is now complete. As you can see, the overseer has been set with two separate range actors, one that draws an indicator at its sight range in white and one that draws an indicator showing its facing in yellow. Testing the map should show these actors in action. Launching a test using the ‘Test Document’ function should give a result like the one pictured below.
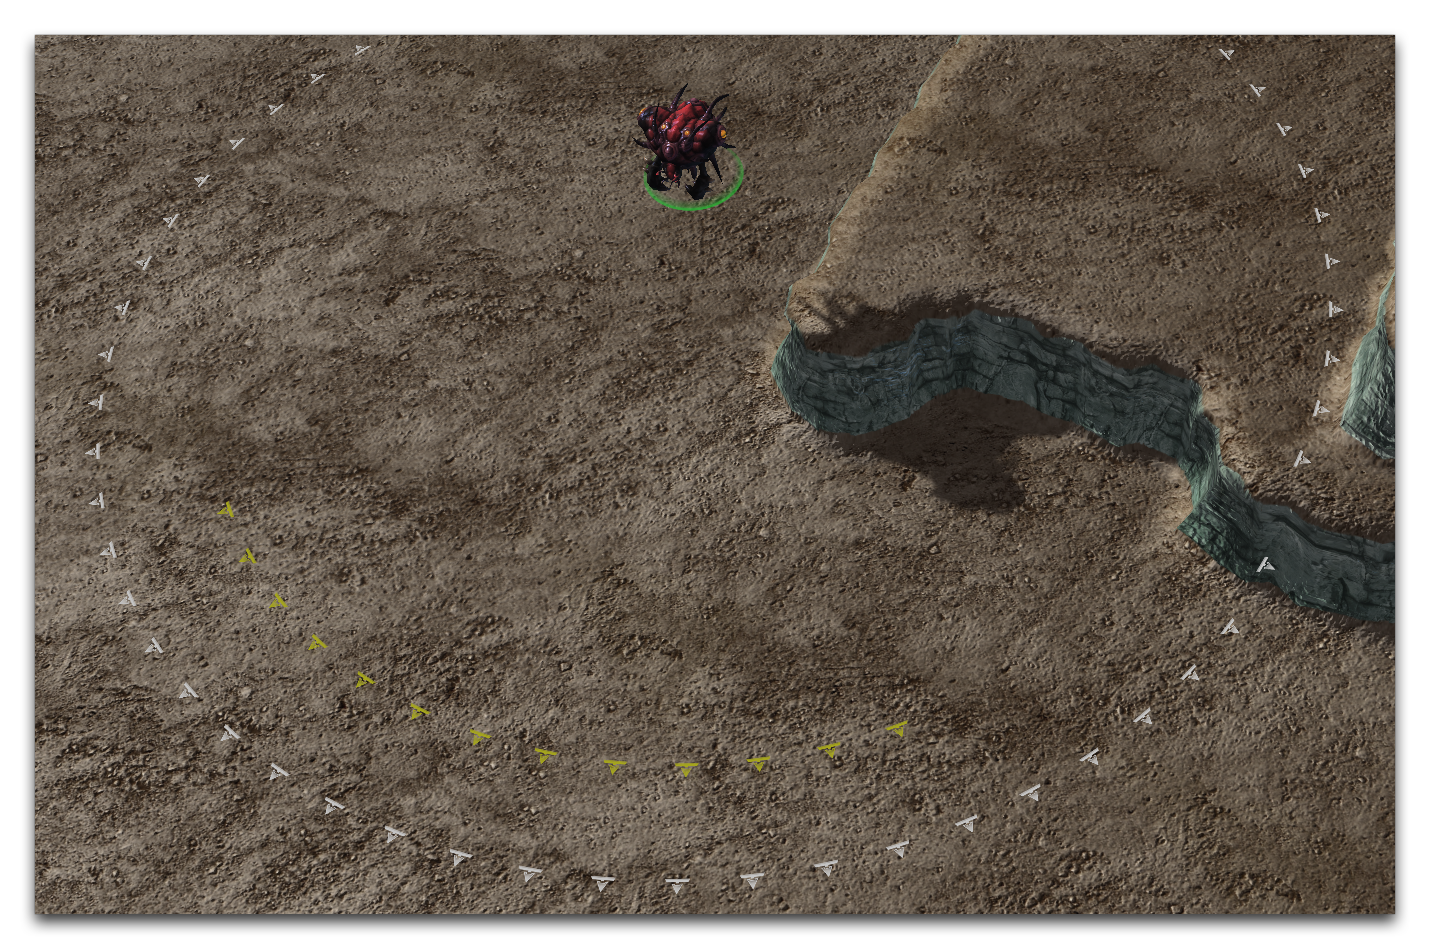 Custom Overseer Range Indicators