Site Operations
Site Operations is a family of actors that modify a host actor’s physical properties. Since these modifications will be propagated to any visuals connected to an actor, site operations can be used to alter the looks and placements of models at game-time.
Site operations include staples like translations and rotations, but also extend to more elaborate controls. You can use operations to graft objects together or even dynamically update an object’s properties over time, simulating independent movement or random variations in effects. It’s also worth noting that operations are not exclusive, they can be stacked and combined in many ways. The image below shows some of the uses of site operations.
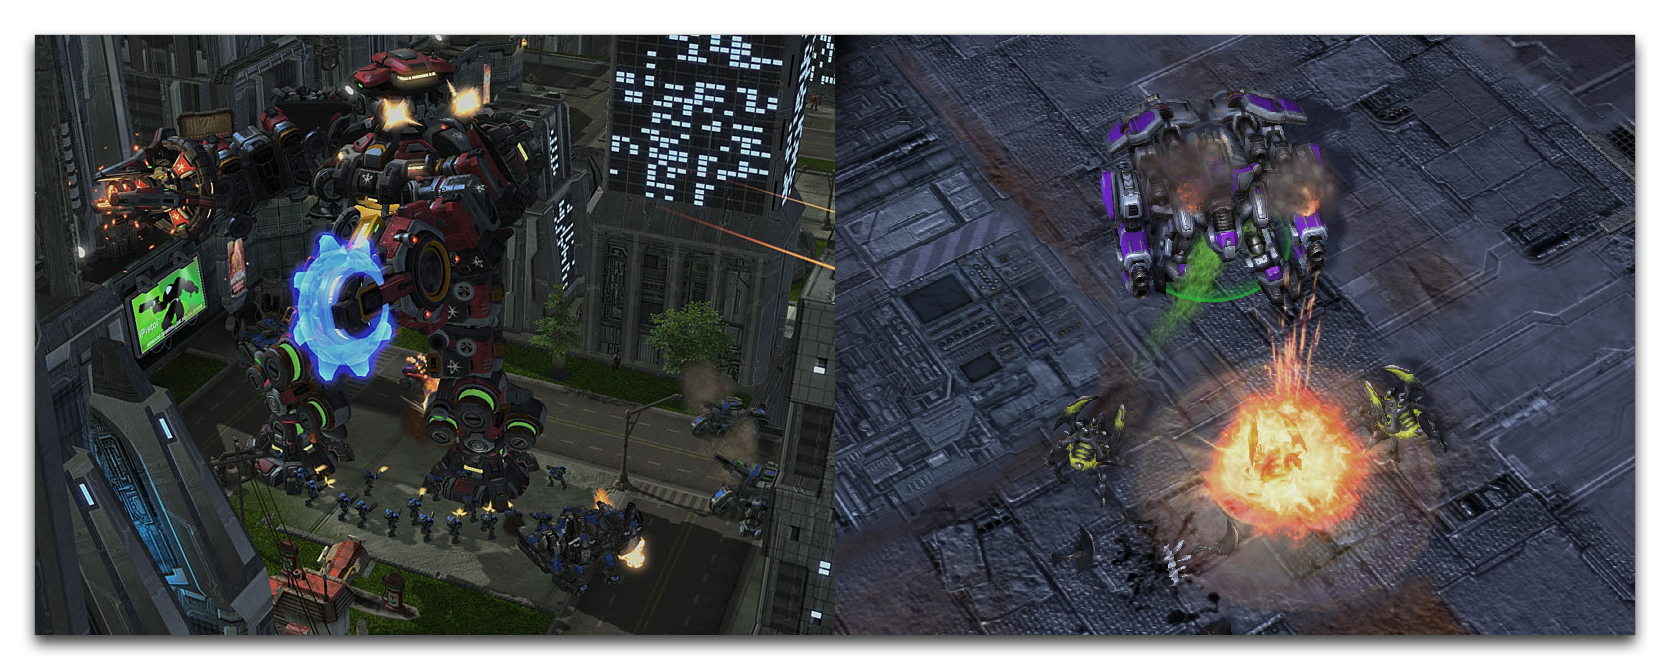
Terratron Built from Attachment Operations – Random Variation Operation on Thor’s Barrage Effect
Creating Site Operations
As a type of actor, you can find site operations under the actors tab of the Data Editor. Open this tab by navigating to + ▶︎ Edit Actor Data ▶︎ Actors.
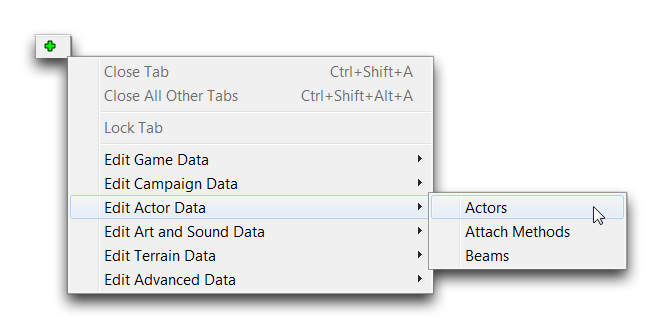 Navigating to Actors in Data
You can create a site operation actor in the actors tab just as you would as any other actor, by right-clicking in the Object List and navigating to ‘Add Actor.’
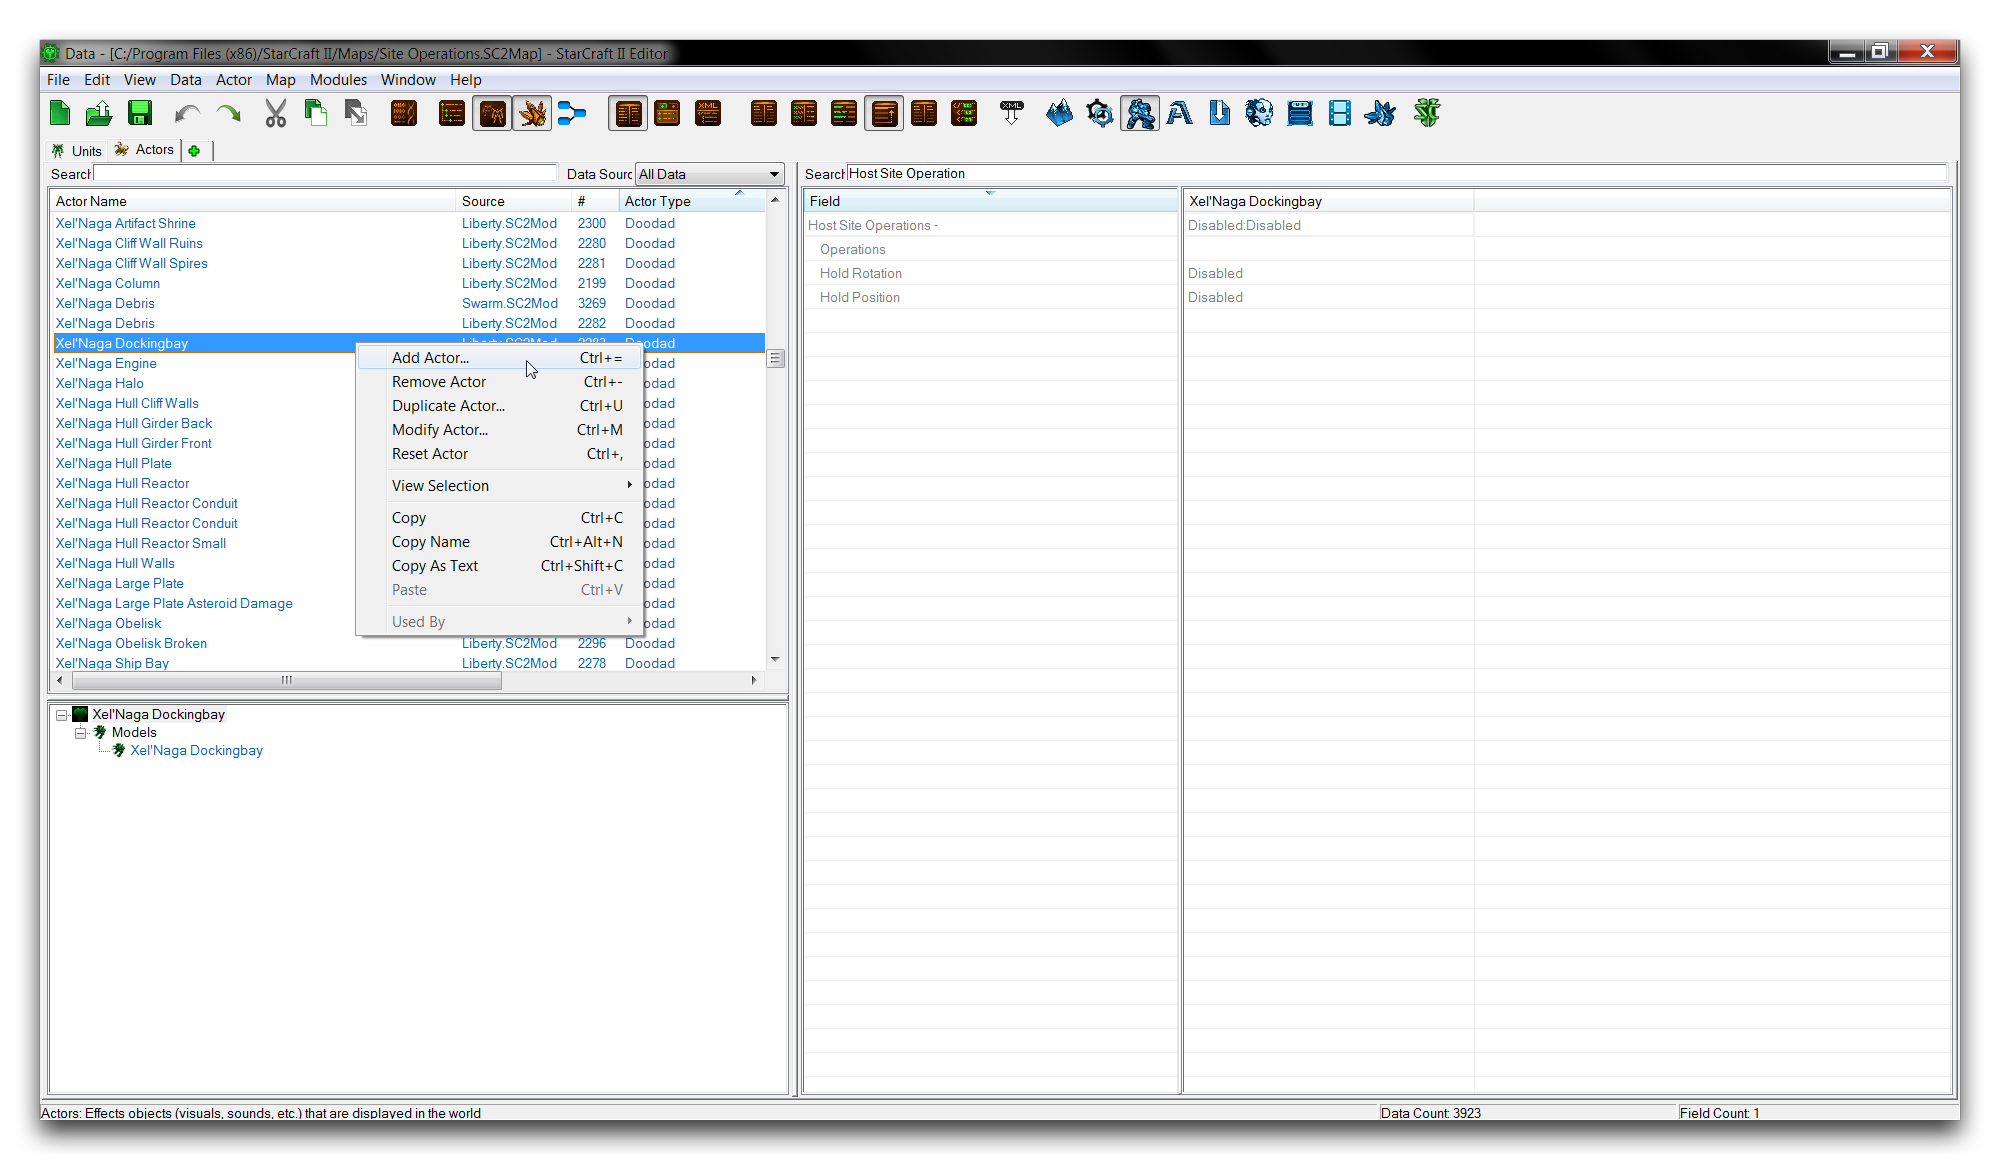 Creating a Site Operation Actor
This will launch the ‘Actor Properties’ window. Use the ‘Actor Type’ dropdown and scroll down the list to the site operations. They have the prefix ‘Site Operation’ and are differentiated by their subtype in brackets. An example of this naming convention is the Site Operation (2D Rotation) actor type, which represents the 2D Rotation Site Operation responsible for rotation strictly in the XY plane. You can see the process of selecting a site operation actor below.
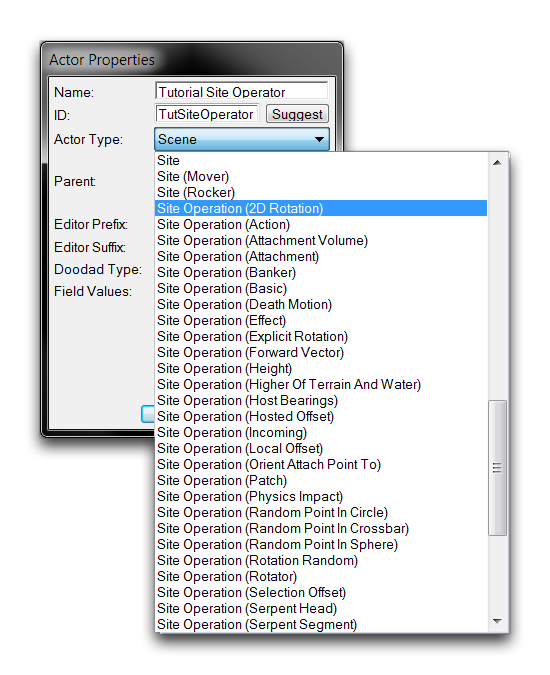 Site Operation Actor List
From here, select any site operation and click ‘Ok’ to finish creating the actor.
Applying Site Operations
You can apply site operations through the ‘Host Site Operations’ field of any applicable actor, an example of which is shown below.
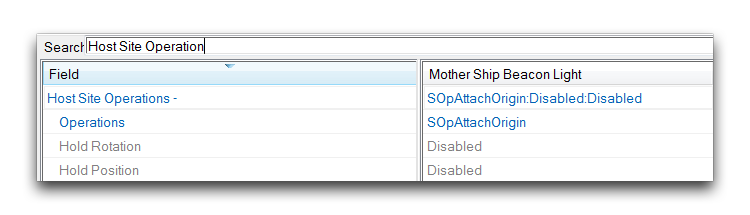 Site Operation Hosting Field
Double clicking on this field launches an ‘Object Values’ window, which provides a list of the currently hosted site operations, as shown below.
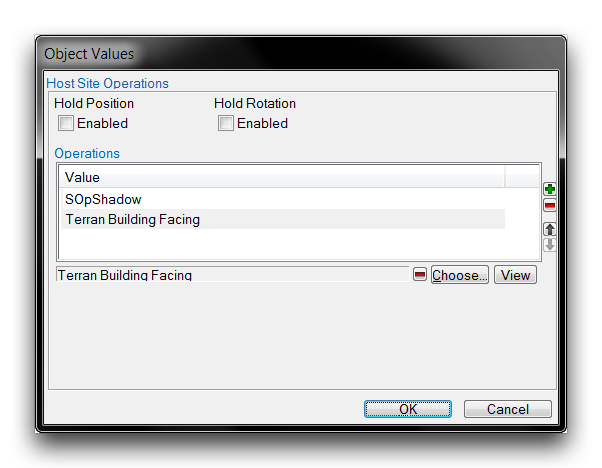 Site Operations View
In this case, the ‘SOpShadow’ and ‘Terran Building Facing’ site operations are already installed on this actor. These represent instances of the Shadow Site Operation and Explicit Rotation Site Operation respectively. A new site operation is added by selecting the ‘Choose’ field, which will launch the window below.
 Selecting Site Operation for Addition
This window allows you to select a site operation. Once you’ve decided on one, click ‘Ok’ to return to the main site operations view. For the purposes of this exercise, choose the ‘SOpHigherBy5’ operation. This will take present you with the view shown below.
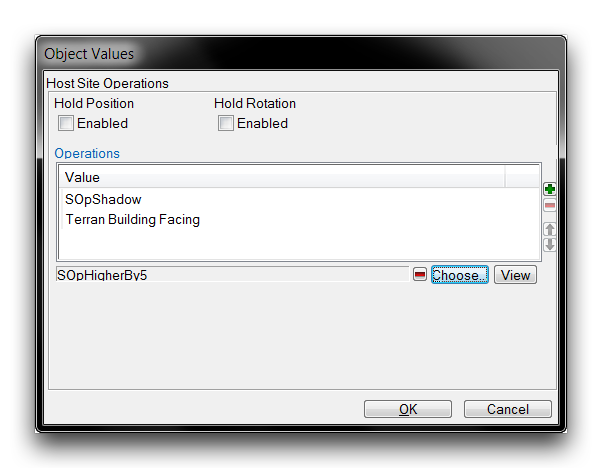 Site Operation Readied for Addition
You can now add the site operation to the actor by hitting the green ‘+’ button on the right-hand side of the window. This will add it to the list of active site operations, as shown below.
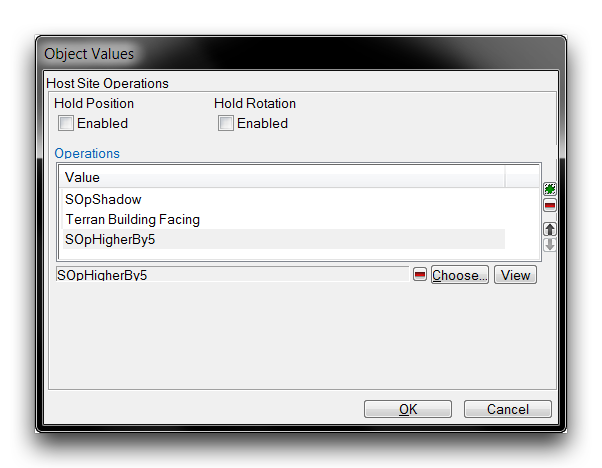 Site Operation Added to Actor
From here, click ‘Ok’ to save the addition and return to the main Data Editor view.
Order Of Operations
It is important to note that site operations are order dependent. Applying site operations in different orders might have wildly varying effects or no noticeable difference at all. To help you manage this, the Editor features a ‘Host Site Operations’ subeditor that lets you change the order in which operations are applied.
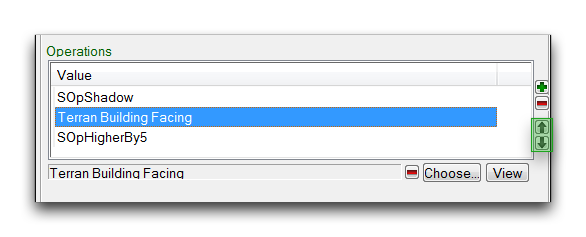 Site Operation Ordering Controls
You’ll find the controls for changing the order in which site operations are applied on the right-hand side of this window. To use them, select a site operation from the list, then click the up or down arrow buttons to move it in the operations list. Site operations will be applied in the order listed in this window, from top to bottom.
To understand the impact of the order in which site operations are applied, consider the ‘Local Offset’ and the ‘Rotator.’ The former operation will move an actor a certain distance in 3D space, while the latter rotates an actor around a point. In this example, both will be applied to a ‘Game Ball’ actor in different orders. Pictured below is a case in which the local offset was applied first.
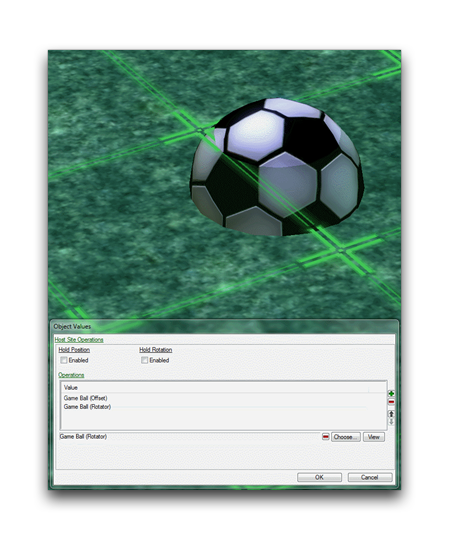 Local Offset then Rotator Site Operation
The next image shows what happens when the rotator operation is applied before the local offset.
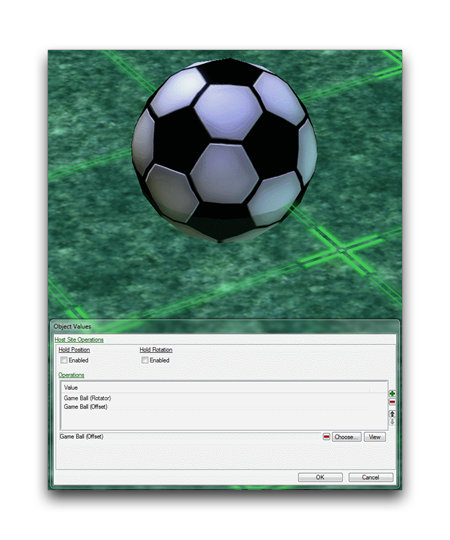 Rotator then Local Offset Site Operation
The most important takeaway here is that the results are not equal despite the same operations having been applied. Below is a breakdown of what has happened in these cases.
- You should note that the local offset was downward, equal to about 25% of the ball’s height. The rotator was equal to about 90 degrees, or a quarter turn.
- Applying the local offset first offset the ball downwards, but also offset the axis of rotation for the rotator. This moves the axis of rotation outside the ball’s center. As a result, rotation actually causes a change in the position of the ball, plunging it forward and into the ground. The ball has altered its rotation and positions in the X & Z axes.
- By contrast, applying the rotator first rotates the ball on the spot. It is then offset downwards into the ground. This means that the axis of rotation is still in the center of the ball. In this instance, the ball only sees rotation and change in its Z axis position.
As shown above, the sensitivity of site operations to the order in which they’re applied can sometimes cause unpredictable results. The best remedy for this potential unpredictability is either careful planning or experimentation with how operations react when combined.