Terrain Editor Interface
The Terrain Editor is probably the most diverse section of the Editor. Beyond its use as a workspace for map design, it is also where many of the Editor’s other sections interact with the map file itself. The Trigger Editor, for example, communicates with the Terrain Editor through points and regions. The Data Editor communicates with it through units and other entities, while the Cutscene Editor works through cameras, and much more.
The Interface
 Interface View of Uvantak’s Ganymede
As you may have guessed from the above, the Terrain Editor serves as a sort of project hub. The end result is that it features a wide range of options and functions. This has led to its being divided into seven individual layers. You can navigate these layers using the Terrain Bar on the Main Toolbar. There you’ll find buttons which take you directly to each layer, as seen below.
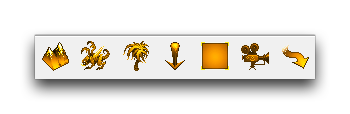 Terrain Bar
By default, the layers are distinctly separated. Once a layer is active, you may only work on elements designated to that layer. While using the Terrain Editor, you will always have one active layer. You can find your current location by checking which layer button is currently highlighted.
Every layer features its own options. These are presented on a large panel on the left-hand side of the main terrain view. This is called the UI Panel. The image below shows how it looks with the Units Layer open.
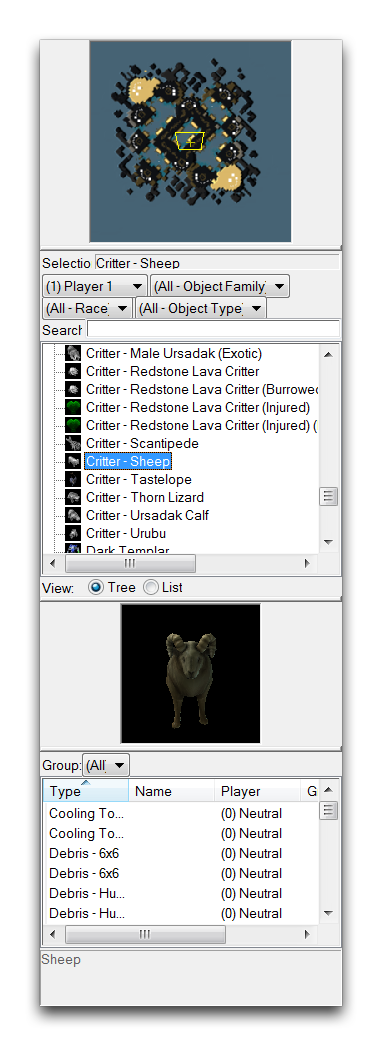 UI Panel
The UI Panel changes depending on the current layer. Each layer has a Palette that offers most of the major controls within that layer. You can read about Palettes in more detail in the individual articles dealing with each layer. It is also worth noting that the top File Tab offers many options, which are broken into subtabs. Those are described below.
View Options
These options control the visibility of individual components within the Editor, change the current viewport properties, and offer some support for camera features. You can reach them from the View Tab, as shown below.
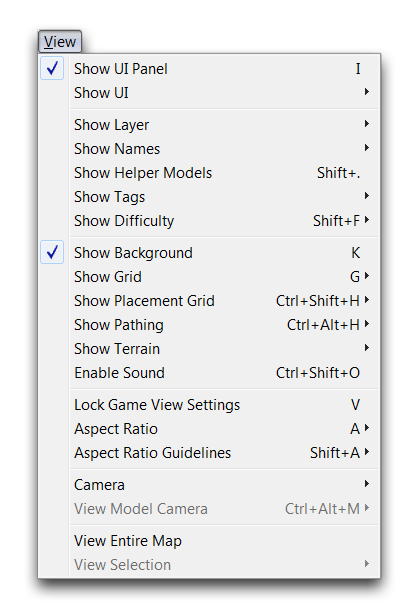 View Tab
| Action | Effect |
|---|---|
| Show UI Panel | Controls the visibility of the UI Panel. |
| Show UI | Controls the visibility of several advanced UI features, such as framerate. |
| Show Layer | Controls the visibility of each layer individually. |
| Show Names | Controls the visibility of the names of elements like points and regions. |
| Show Tags | Controls the visibility of tags created within the ‘Map Properties’ menu. |
| Show Difficulty | Controls the visibility of the difficulty setting of units. |
| Show Background | Controls the visibility of the skybox in the Editor display. |
| Show Placement Grid | Controls the visibility of grid components. |
| Show Pathing | Controls the visibility of differing types of pathing, such as ‘Unpathable Areas’. |
| Show Terrain | Controls the visibility of certain terrain components such as creep, water, or map bounds. |
| Enable Object Sounds | Toggles the sound effects for placing objects in the Editor. |
| Lock Game View | Locks the camera to the specific settings found in melee games. |
Render Options
This section contains options you can use to control the visibility of advanced graphical elements in the Editor. You can find them using the Render Tab, as seen below.
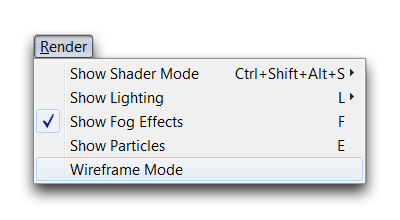 Render Tab
| Action | Effect |
|---|---|
| Show Shader Mode | Controls the visibility of the different types of shaders. |
| Show Lighting | Choose to display either the game lighting or custom lighting currently being edited. |
| Show Fog Effects | Controls the visibility of fog features. |
| Show Particles | Controls the visibility of particle elements including models, actors, and so forth. |
| Show Wireframe Mode | Enables a mode that displays every element in wireframe. |
Below is a shot of a few hydralisks that has been set to show in wireframe mode.
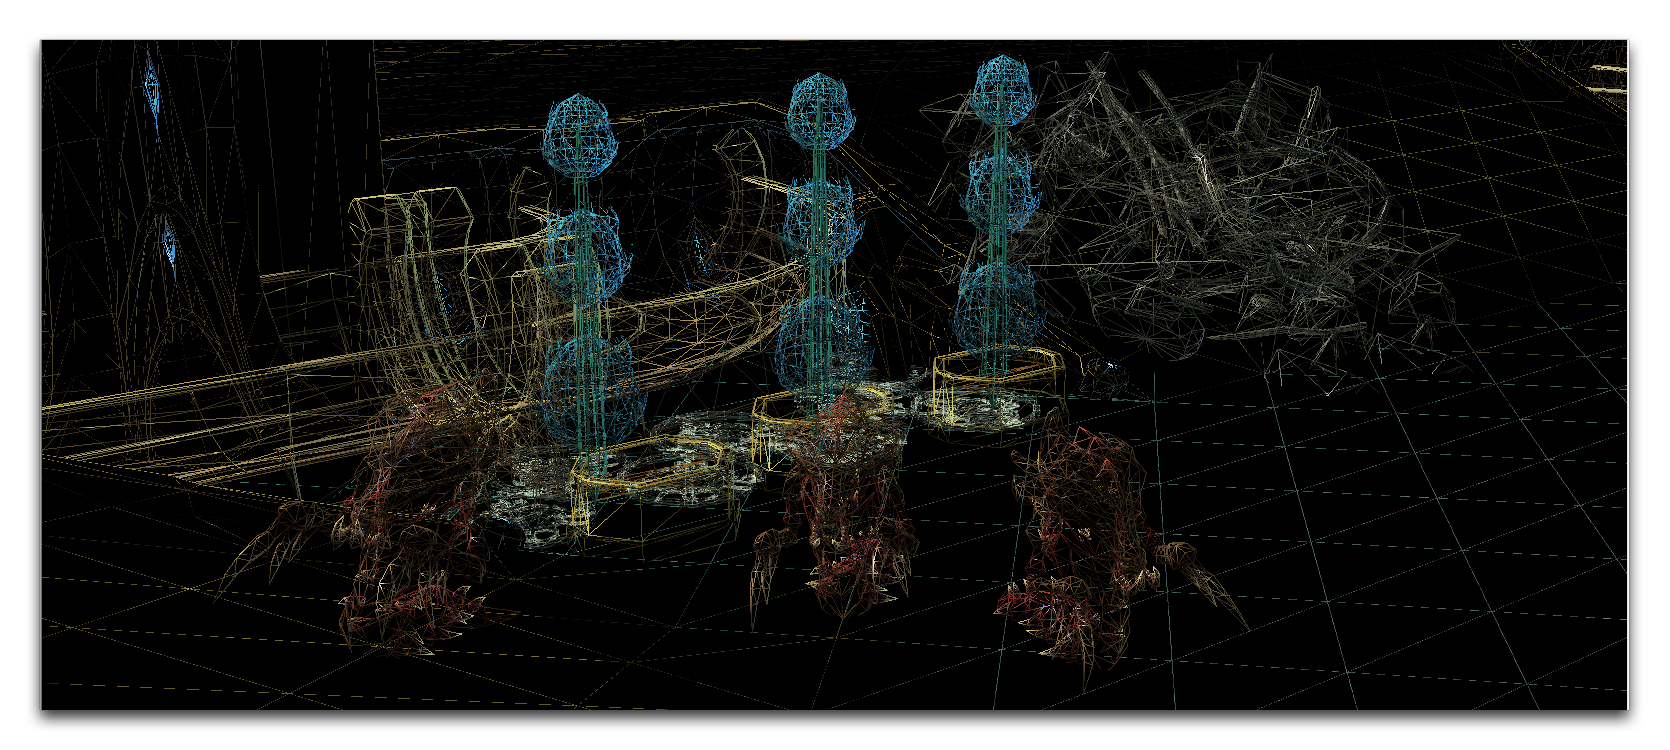 Wireframe Mode
Layer Options
This section allows you to control which layers are active at any given time, breaking their default separation. You can do this using the Select From field to activate different configurations of layers. You will also find the navigational options here, which allow you to move from layer to layer, the same as the Terrain Bar. You can find layer options using the Layer Tab, shown below.
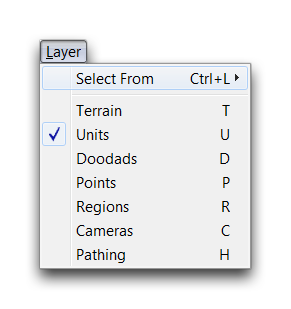 Layer Tab
Tools
Here you’ll find options supporting basic functions like selecting and designing a map. You can navigate the tools using the Tools Tab.
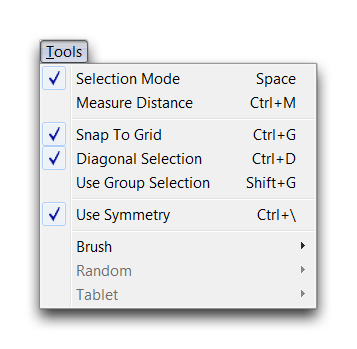 Tools Tab
| Action | Effect |
|---|---|
| Selection Mode | Allows you to select objects using the mouse. |
| Measure Distance | Changes the cursor into a measuring tool. |
| Snap to Grid | Alters grid-snapping behavior for placing elements. |
| Diagonal Selection | Rotates the axis for selection, so box selection occurs along a 45° axis. |
| Use Group Selection | Changes selection behavior to only affect units within a group. |
| Use Symmetry | Toggles the symmetry behavior used for the map. |
The Measure Distance option changes the default mouse so that you can measure from one point to another. This can be useful in determining rough distances for things like melee map design, as well as helping with calculations for triggers or data. You can use the tool by clicking once to begin measuring, then clicking at your desired endpoint. The image below shows Measure Distance in action.
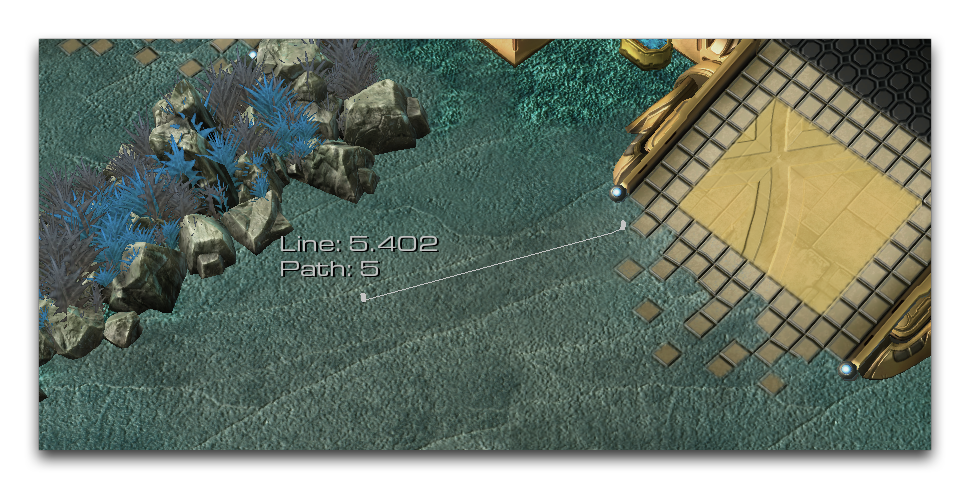 Measuring Tool